This page will teach you how to properly setup, test and begin using the Logitech C930e webcam along with the LED ring light and accompanying stand.
Please read through this guide carefully before attempting to setup the gear on your own. Finally, if you prefer to learn these materials through a video tutorial instead of text and images, please click here
Logitech C930e Webcam
Camera Overview
Let’s first go over the features of the webcam before we plug it in.
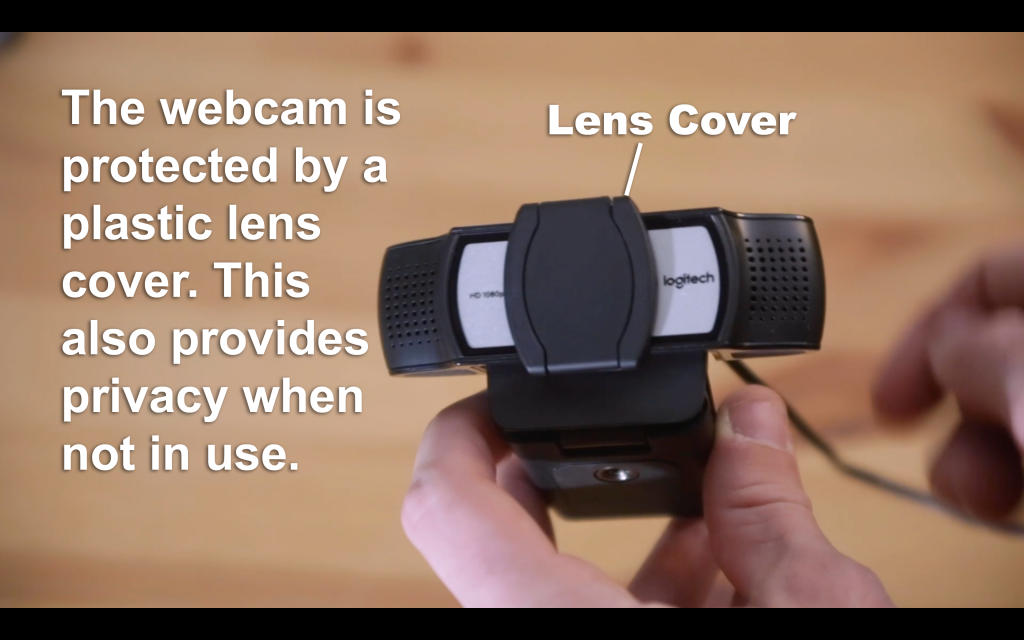
The webcam is protected by a plastic lens cover. This also provides privacy when not in use. 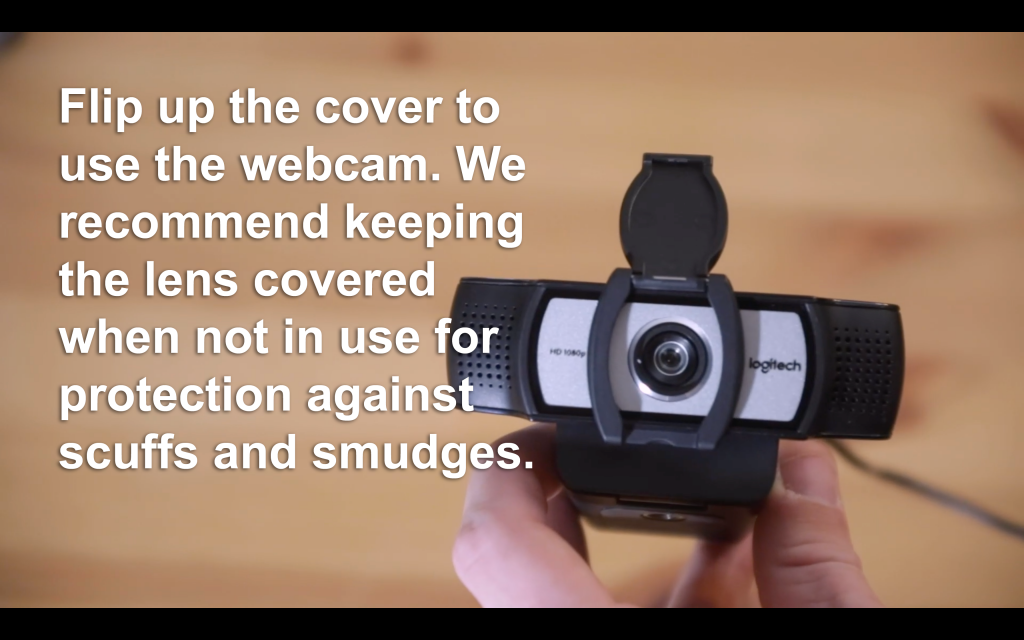
Flip up the cover to use the webcam. We recommend keeping the lens covered when not in use for protection against scuffs and smudges. 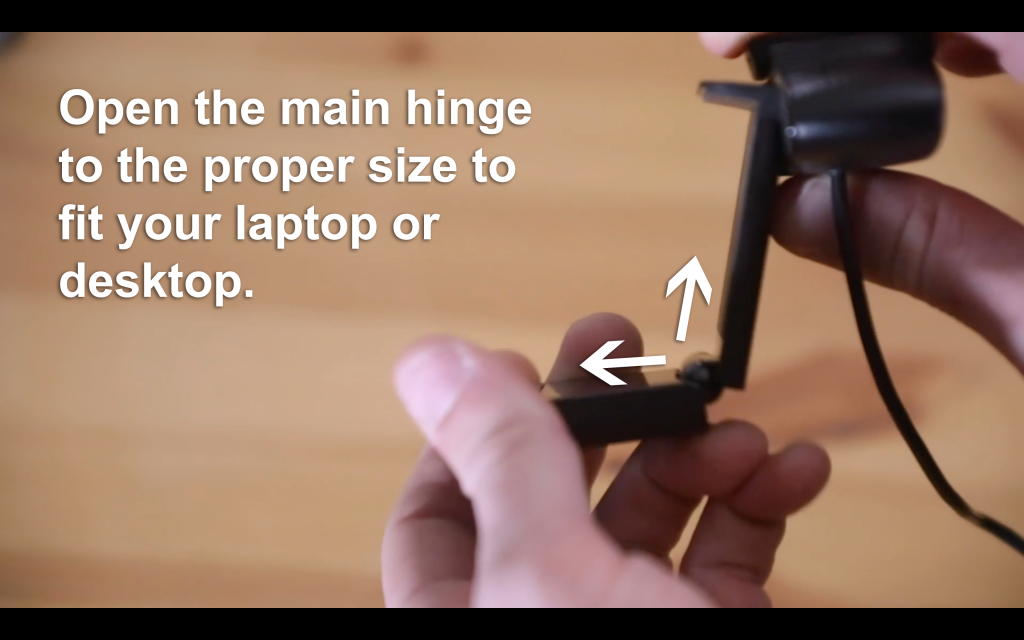
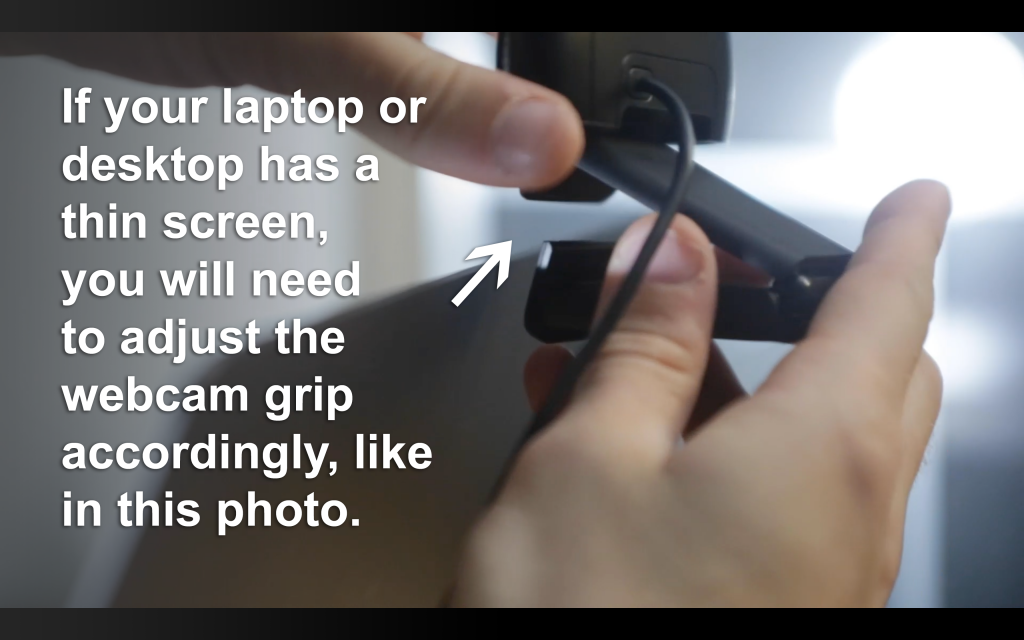
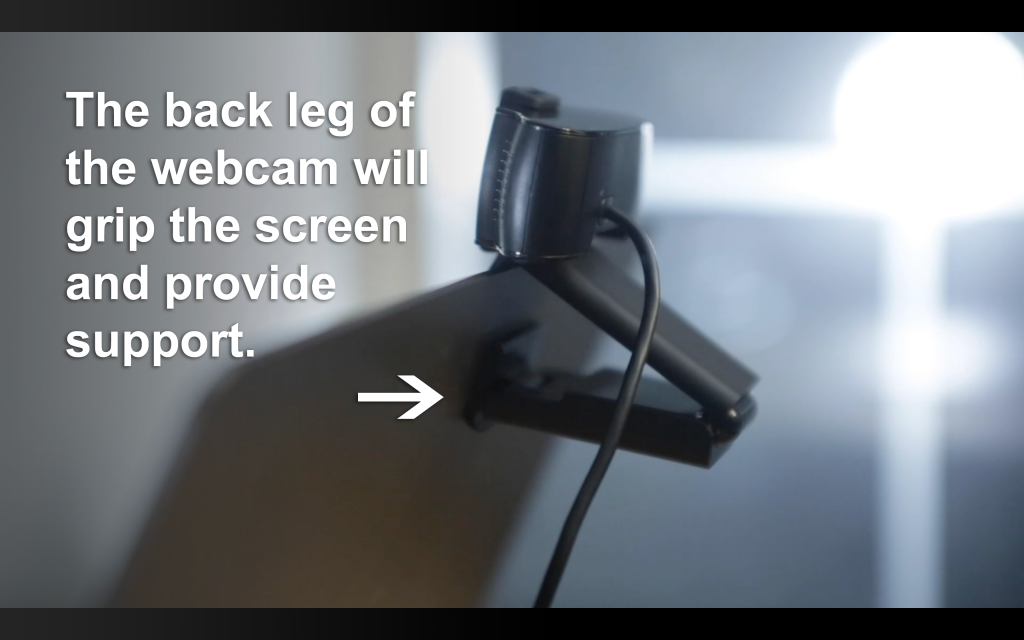
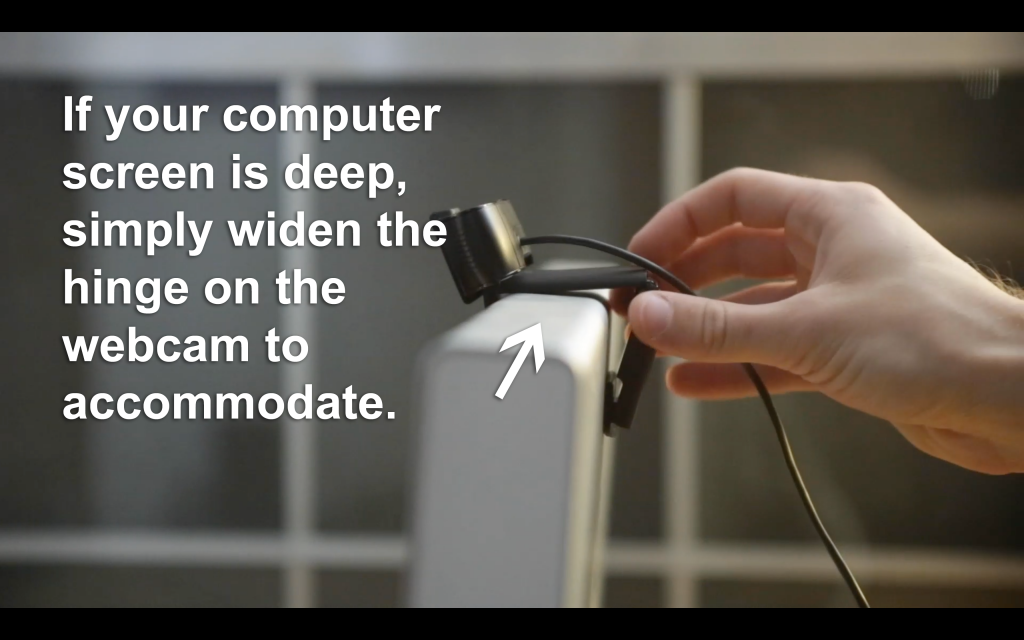
Open the main hinge to the proper size to fit your laptop or desktop 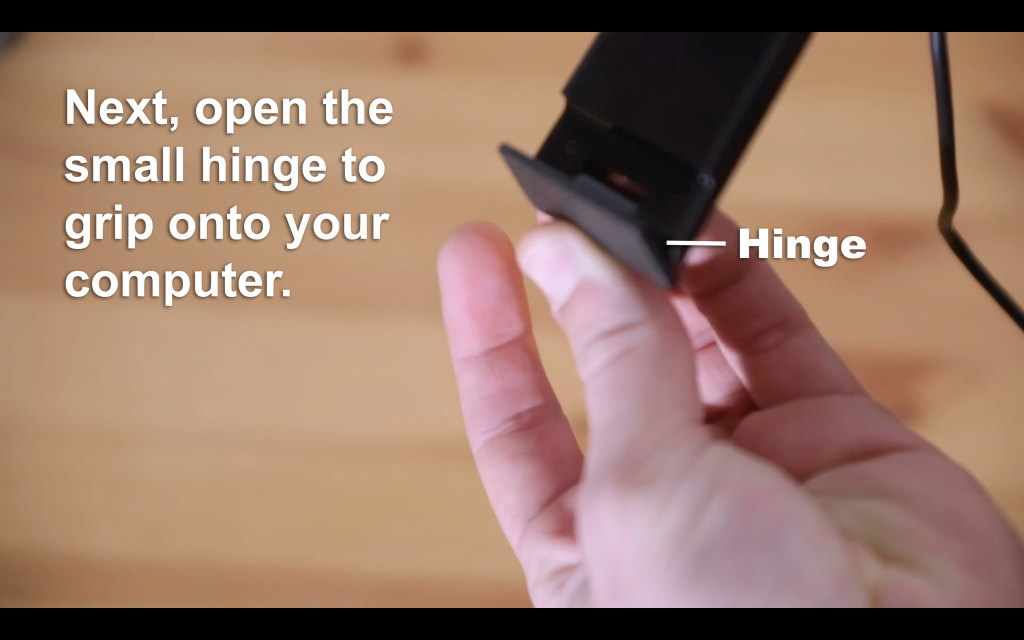
Next open the small hinge to grip onto your computer. 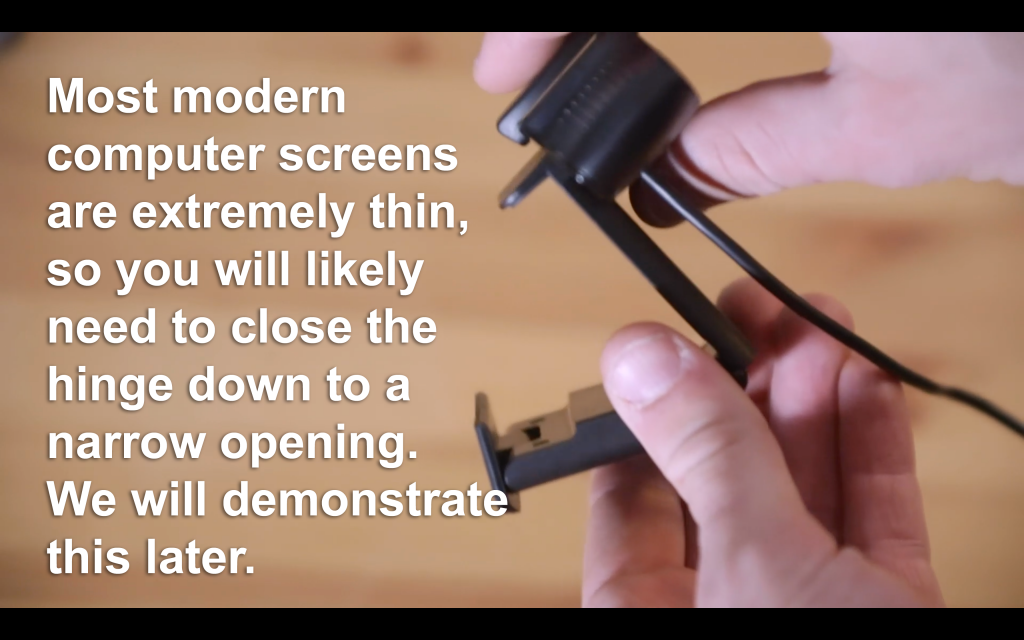
Most modern compute screens are extremely thin, so you will likely need to close the hinge down to a narrow opening. We will demonstrate this later. 
Last, if your lens cover falls off, you can add it back on by first hooking the cover onto the bottom lip. 
Next, attach the top lip and the cover will snap into place.
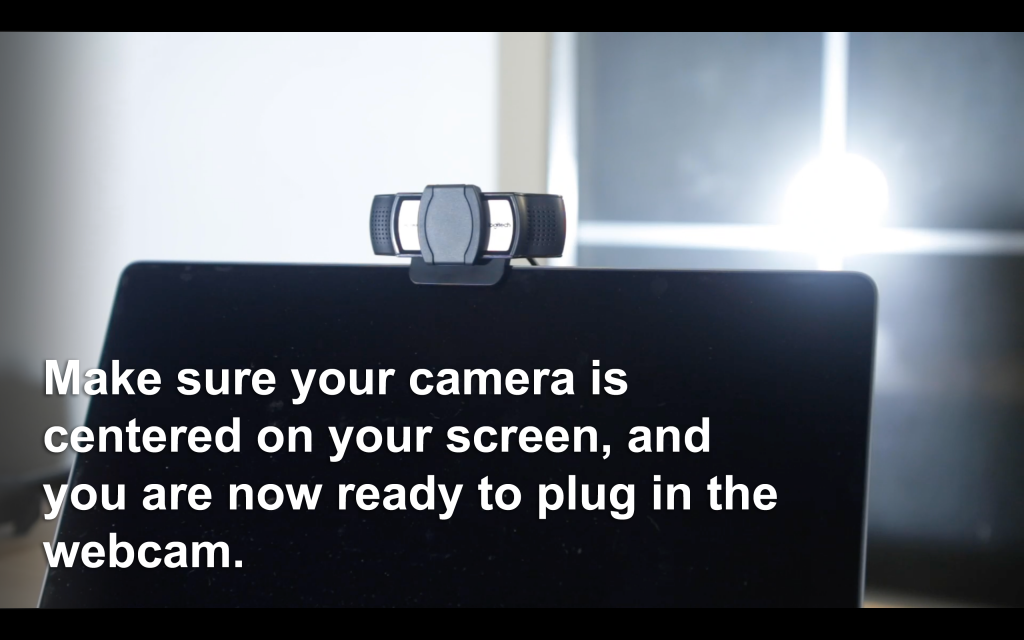
Attach the webcam to your laptop or desktop.
The Logitech C930e can fit onto any laptop or desktop computer.
Plug the camera into your computer
Once you have positioned the webcam on your computer, you’re ready to plug it into your computer.
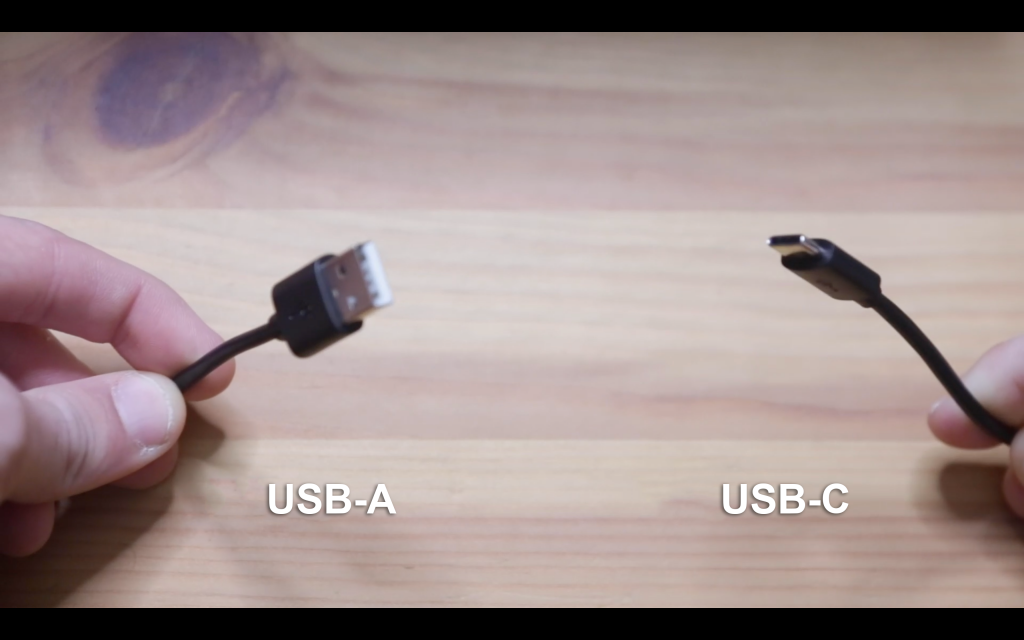
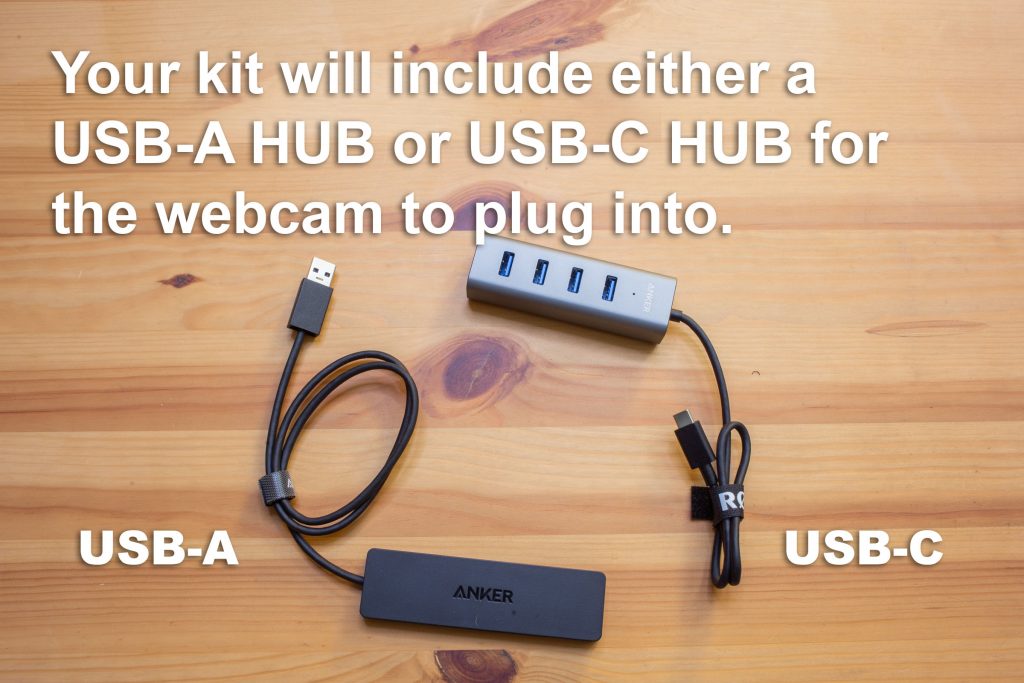
The webcam is USB-A, so if your computer has one of these ports, simply plug it in. If your computer uses USB-C, please attach one of the adapters provided in your kit, then plug in the webcam.
There are no drivers for your computer to recognize the webcam, but Logitech offers a free software called Camera Settings that can give you greater control of your image.
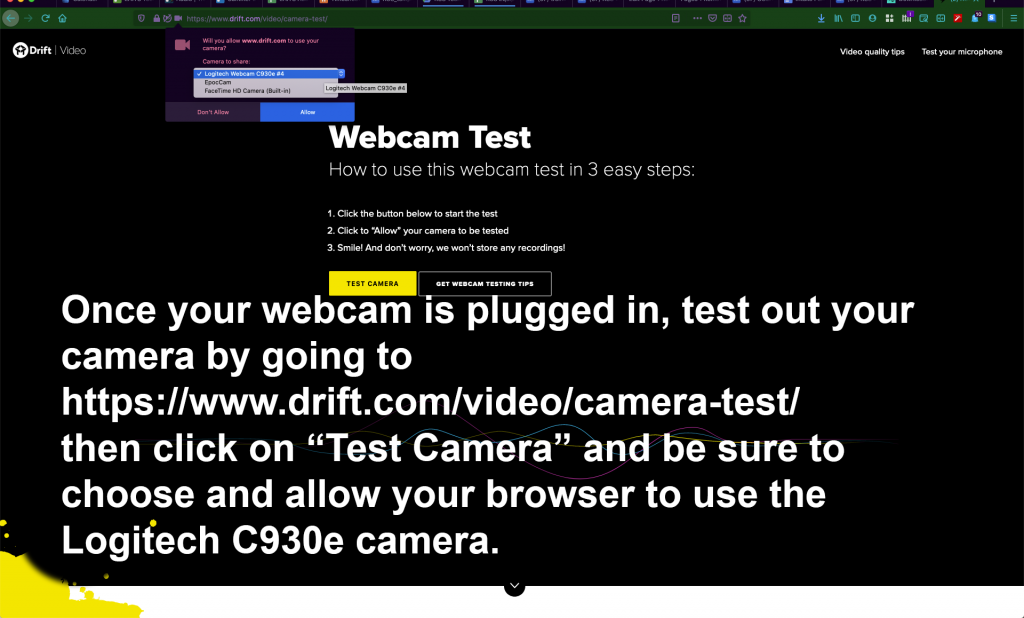
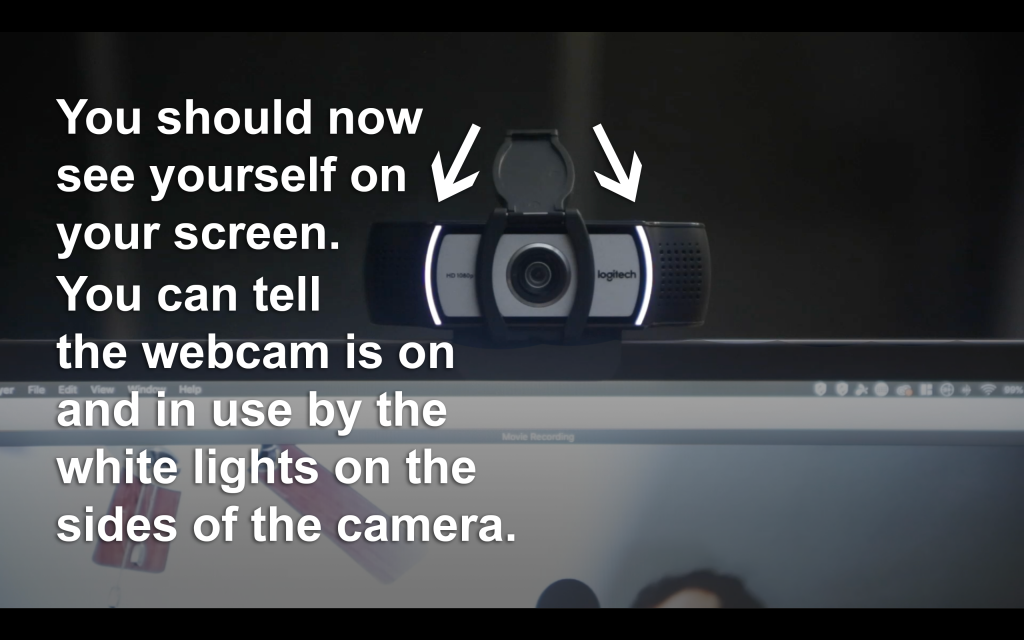
Once the camera is plugged in, you can test to make sure it works by going to the Drift Camera Test and clicking on Test Camera.
Notice that when the camera is in use, the white lights on the edges of the camera activate.
Additional Tips and Software to get the most out of your image
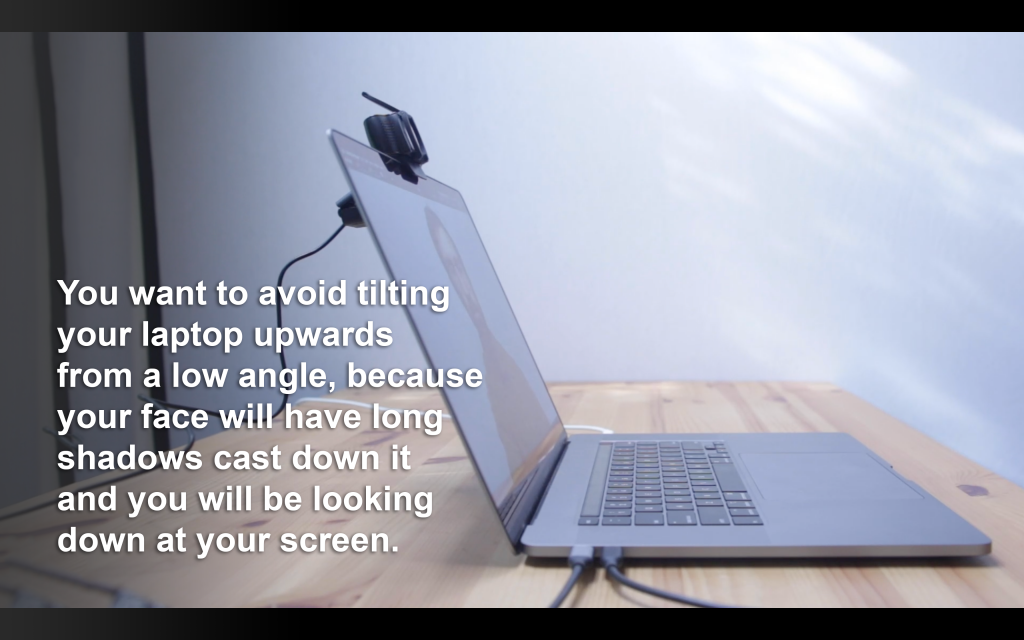
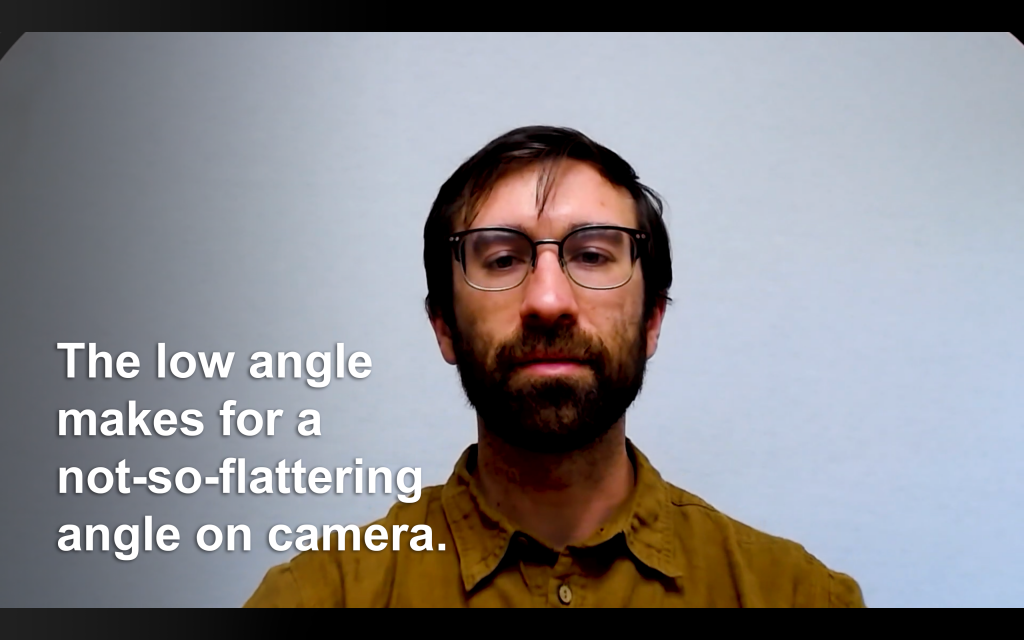
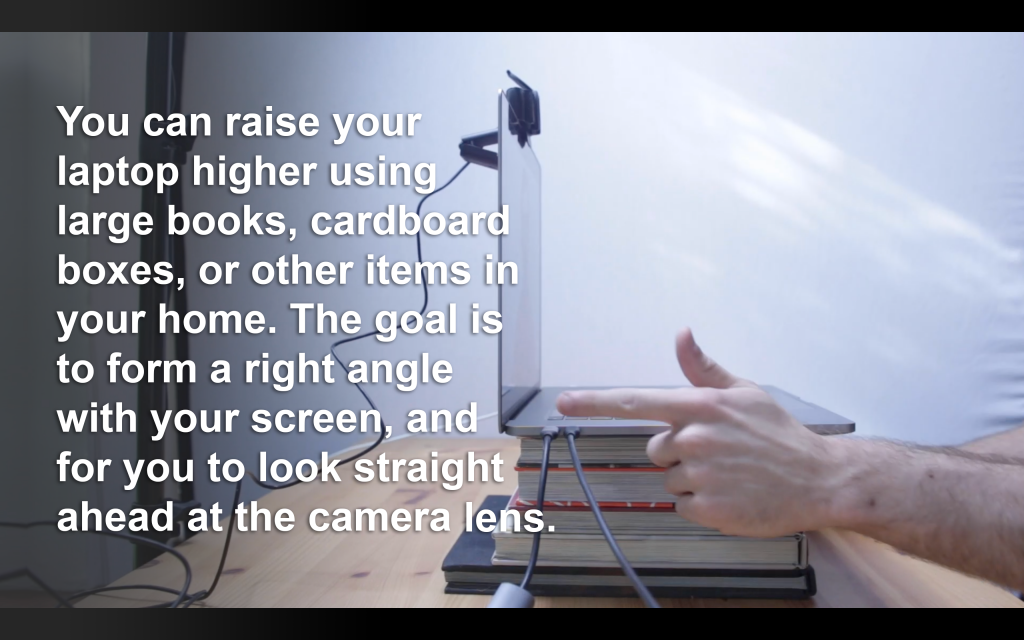
Now that your webcam is working, we can adjust it to make sure your image quality is as good as possible.
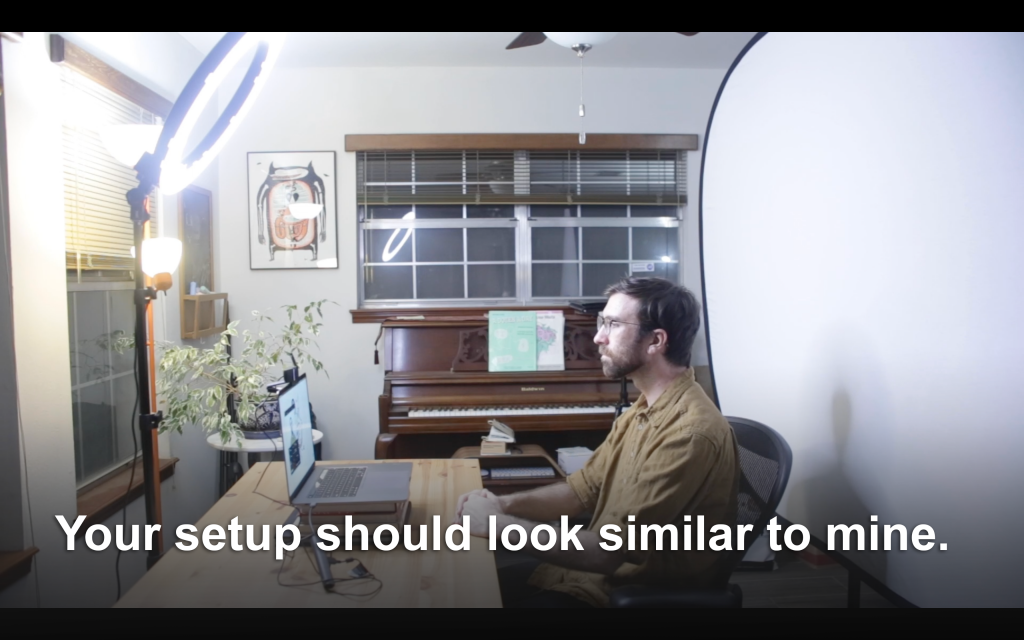
Light Stand
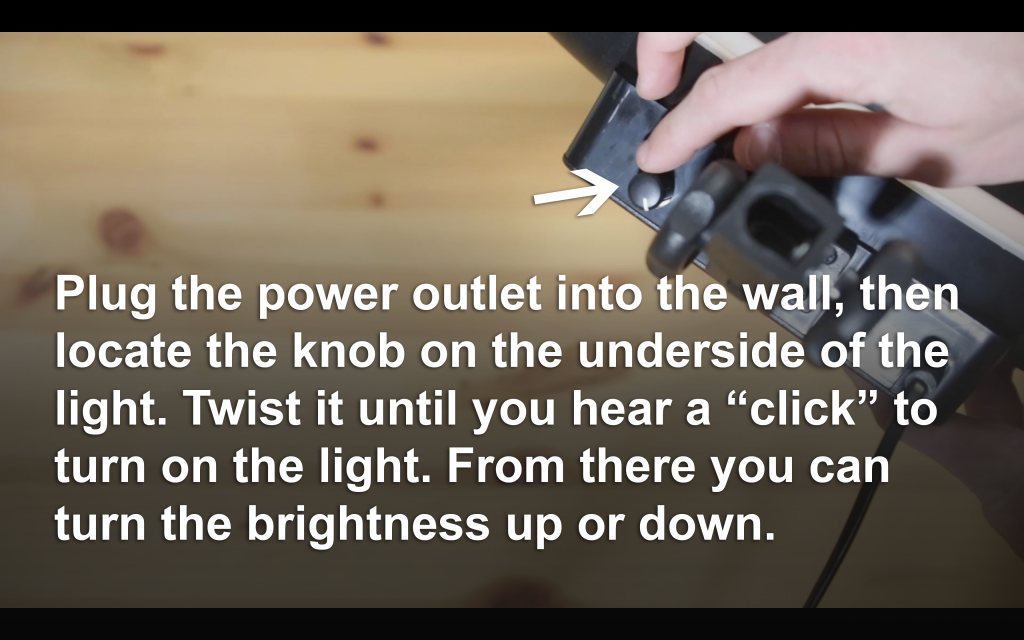
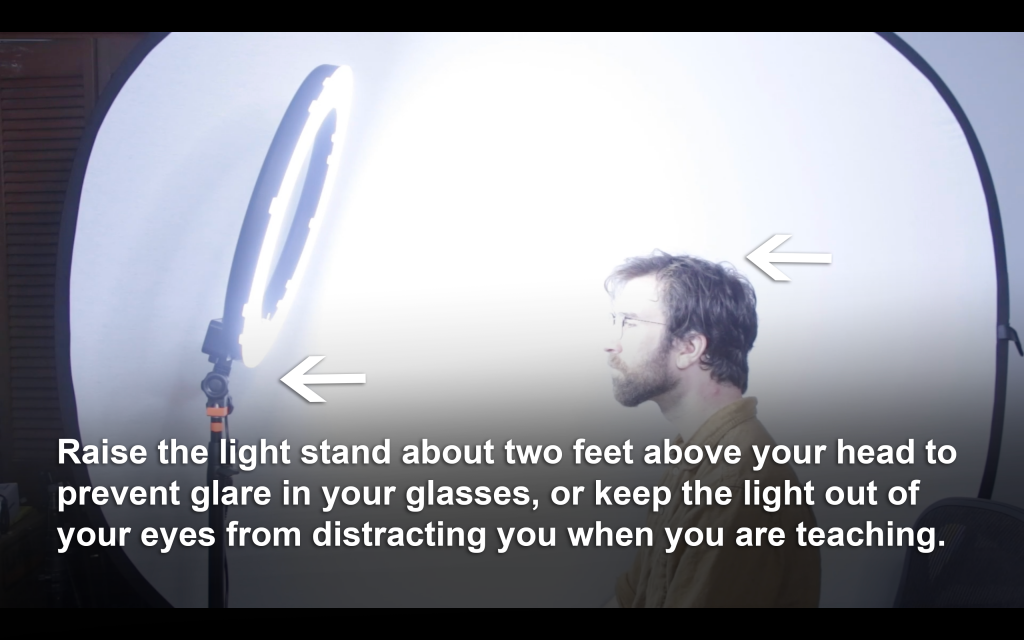
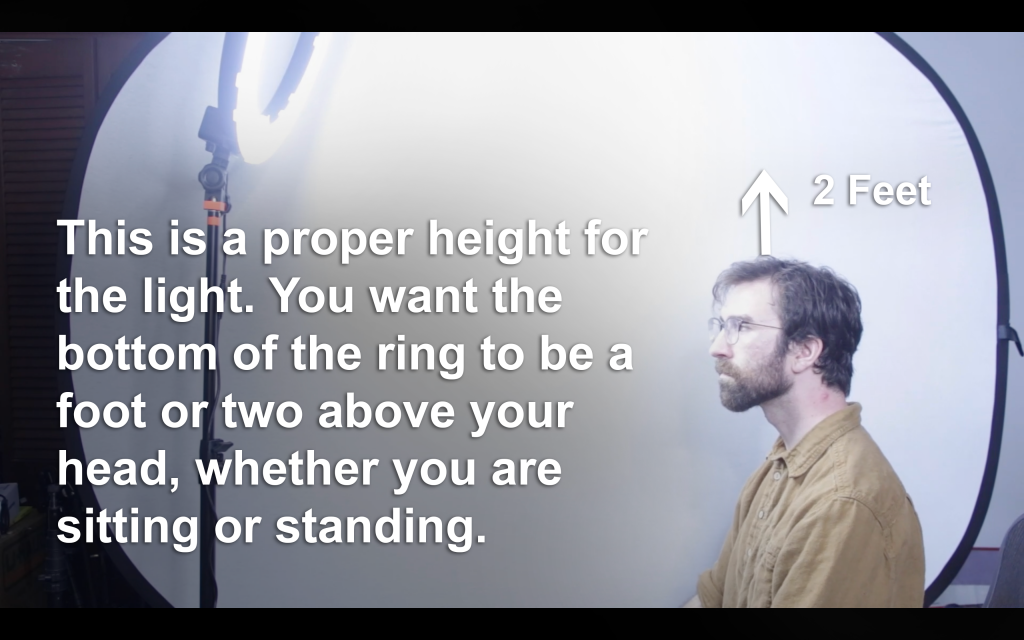
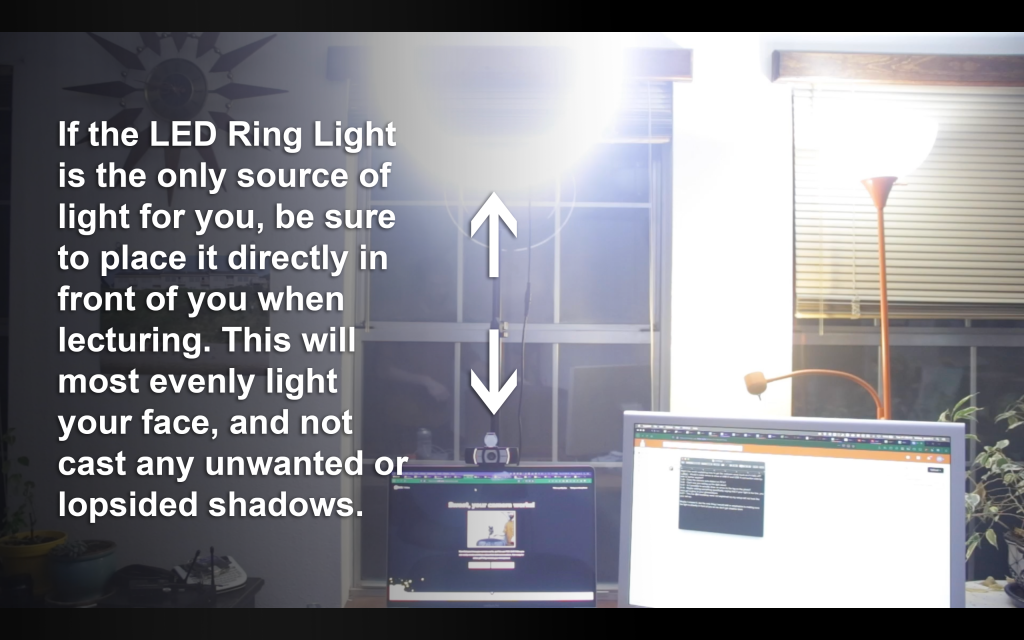
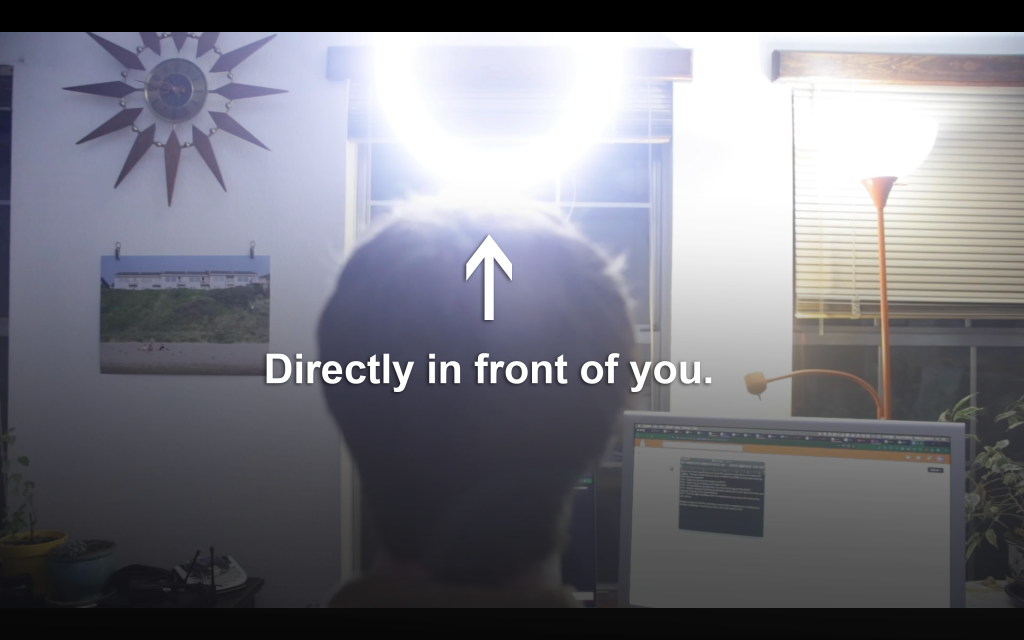
The most important element in achieving a professional, high-quality video image is proper lighting. If you have a very nice camera, but bad or insufficient lighting, you will never be able to maximize its full potential.
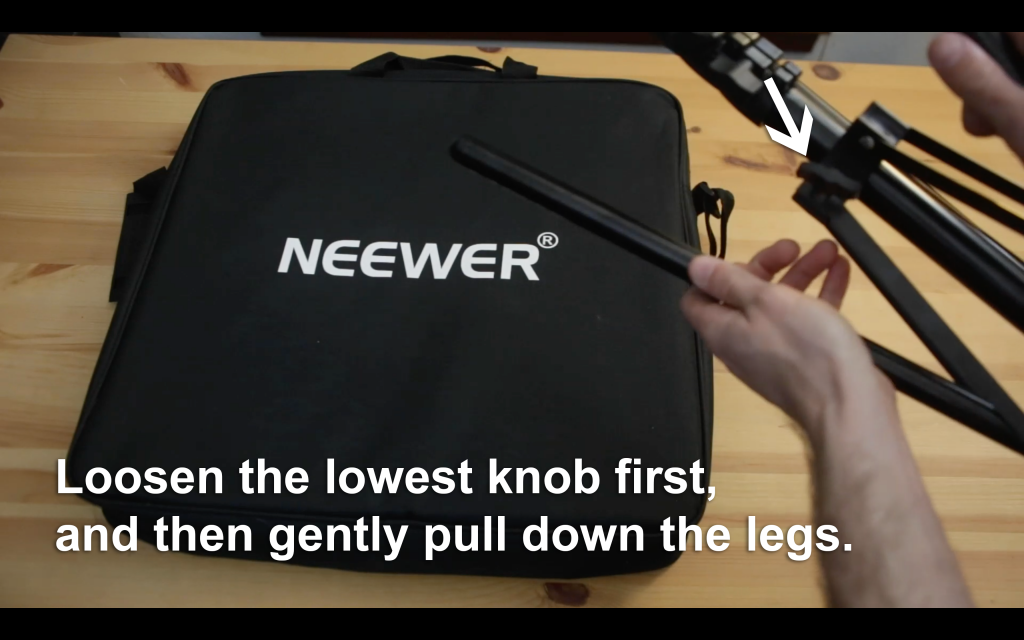
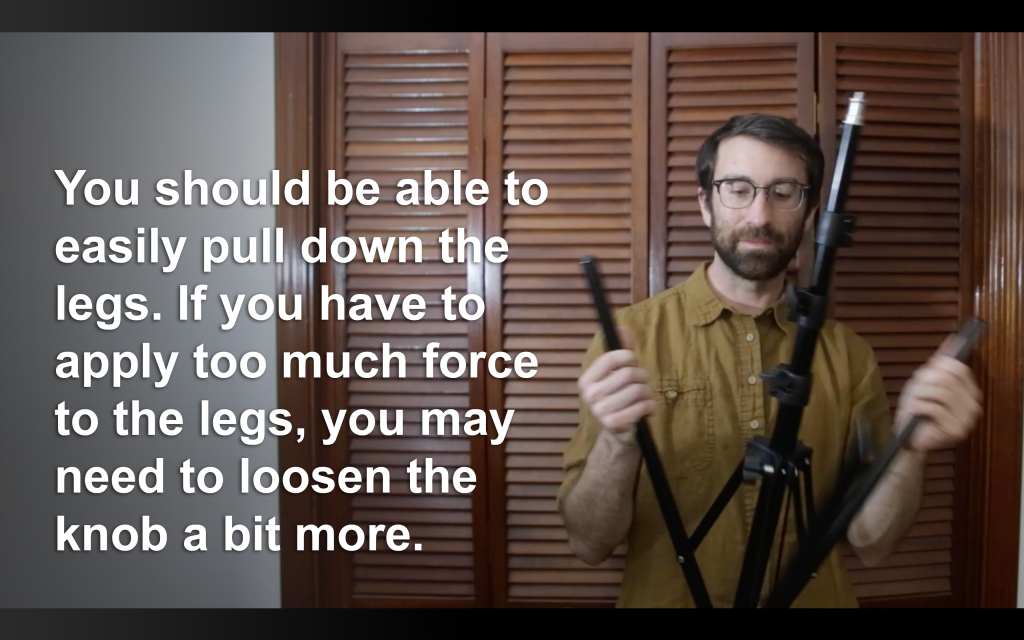
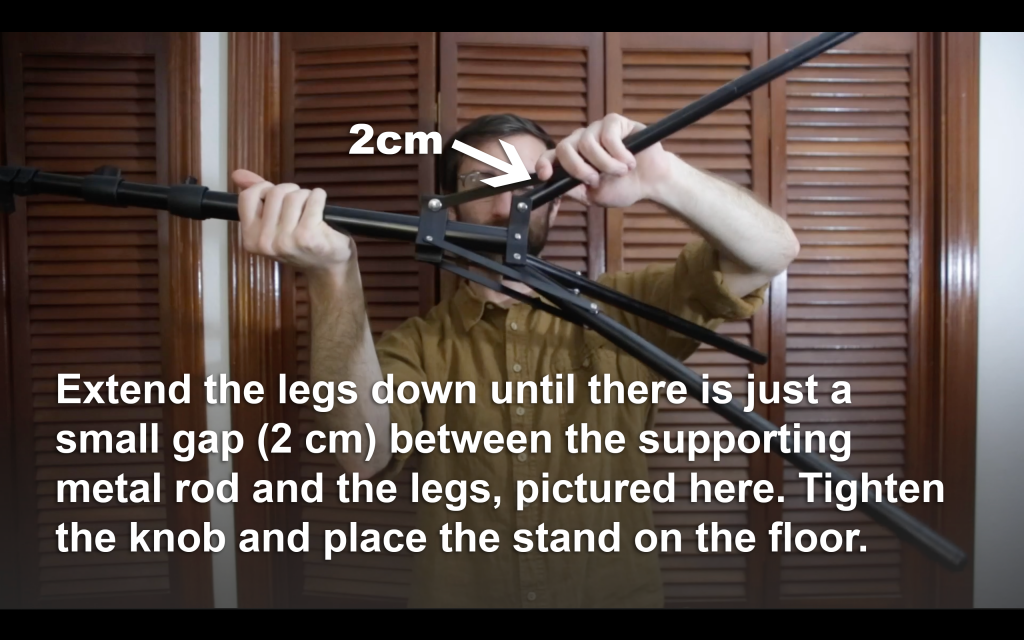
Setup the light stand
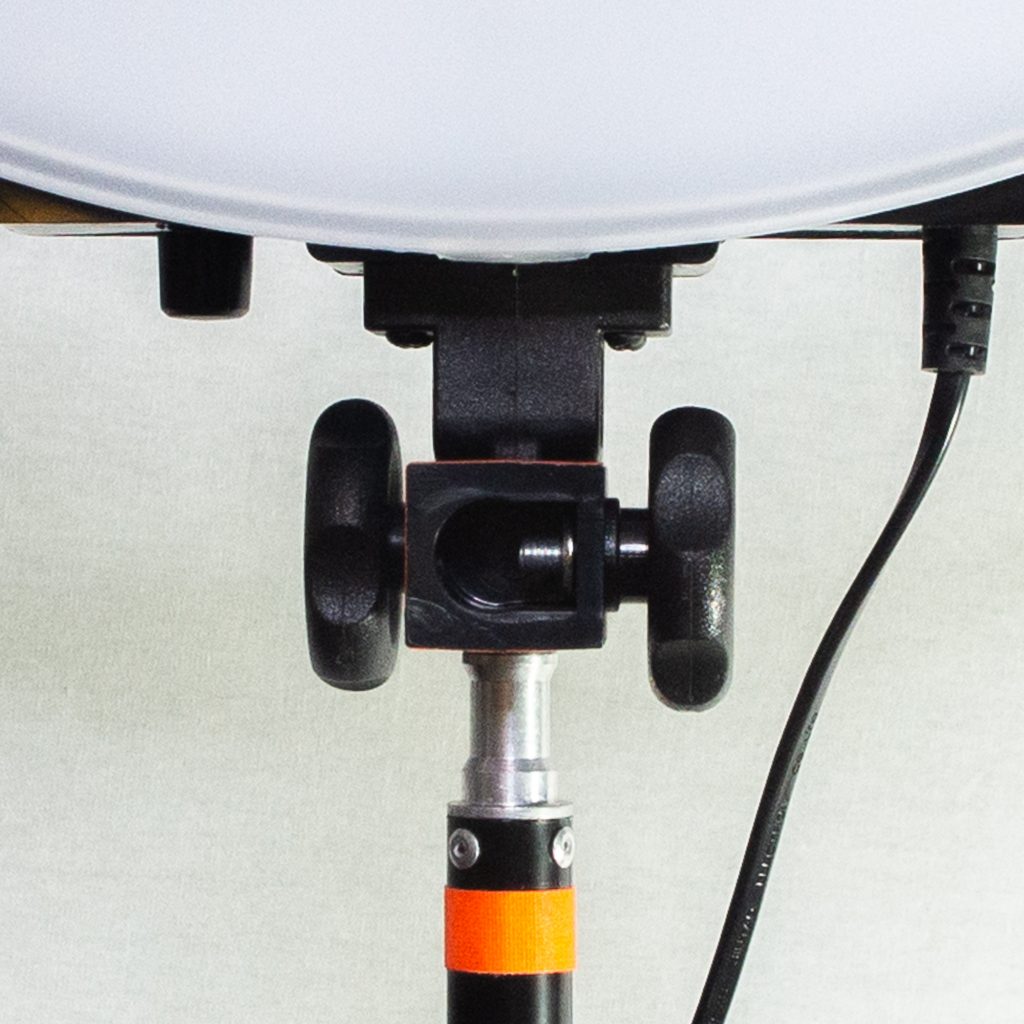
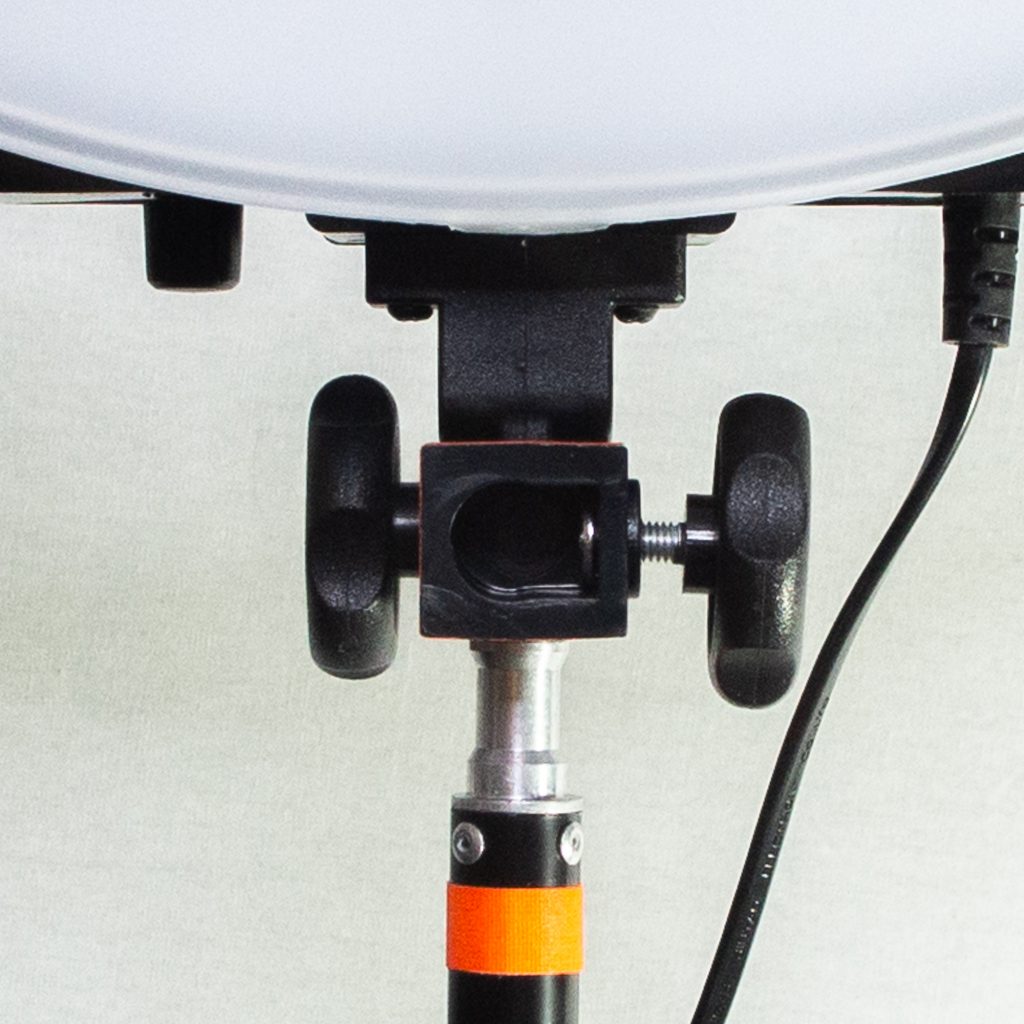
Before we setup the LED light, we must first set up the light stand.

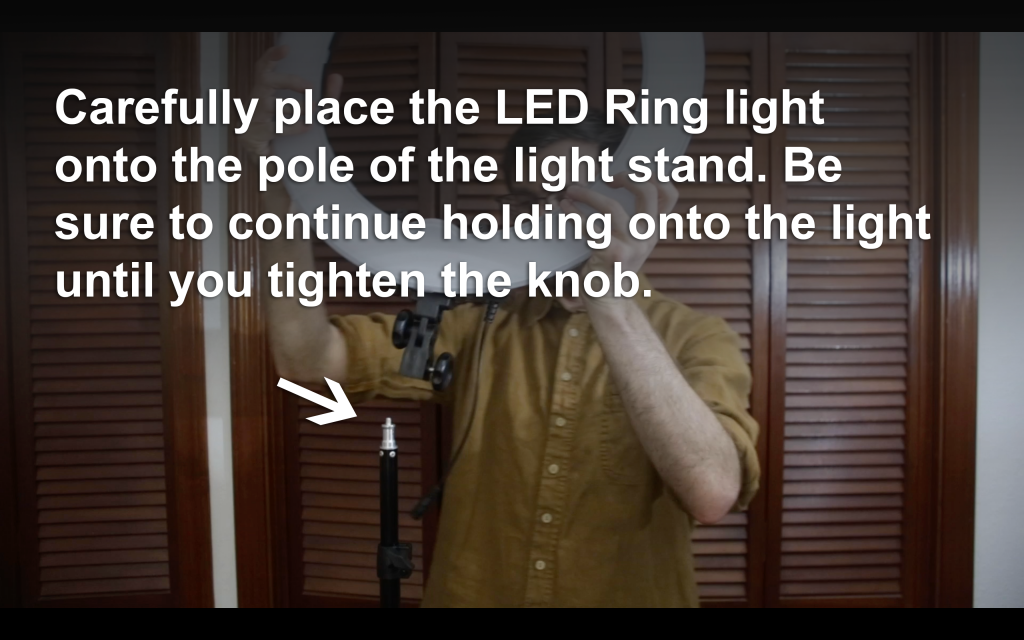
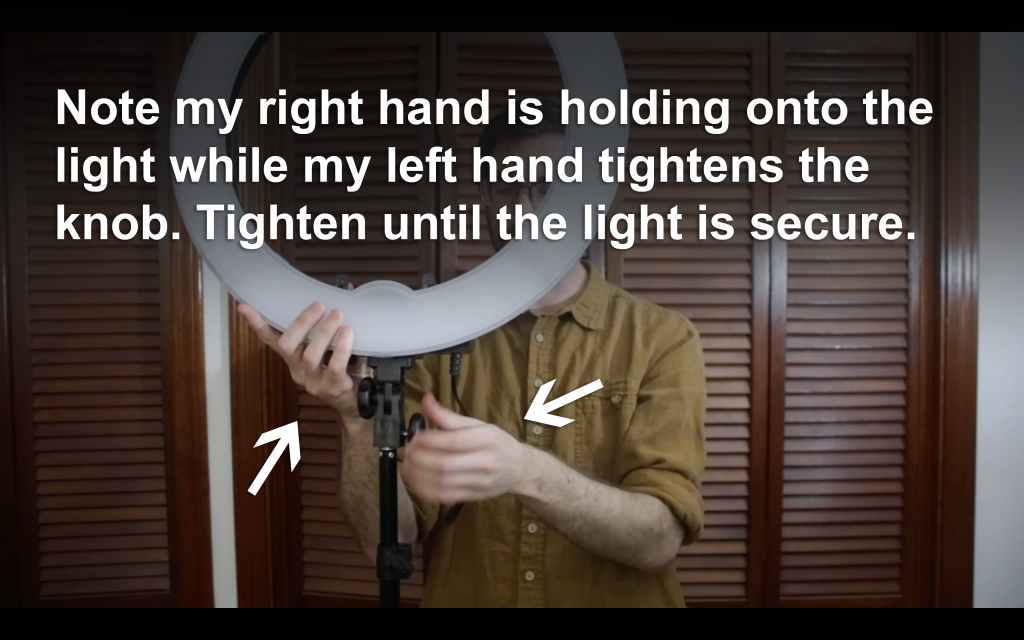
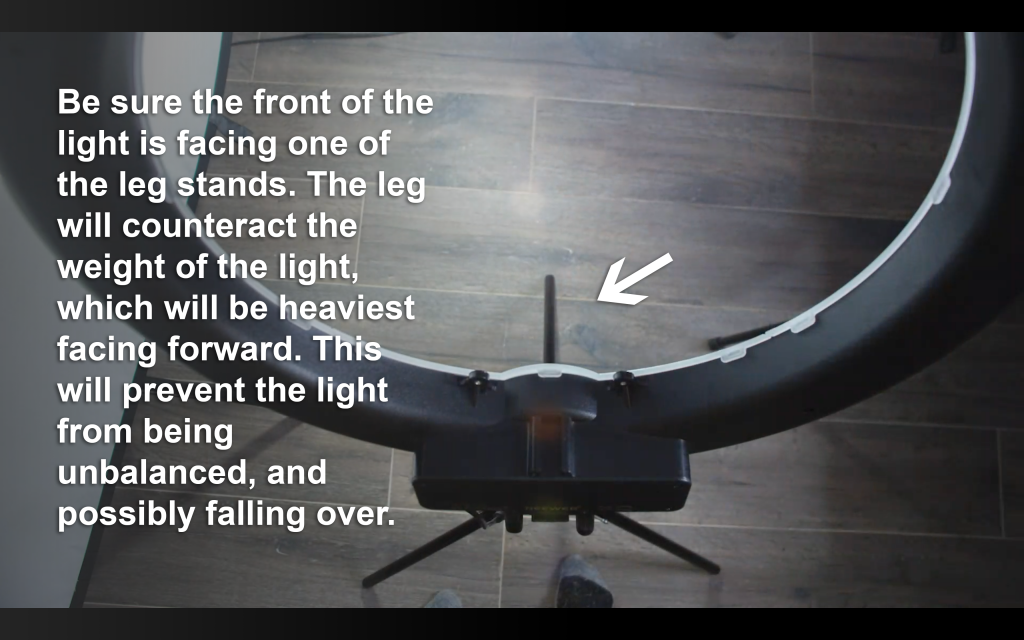
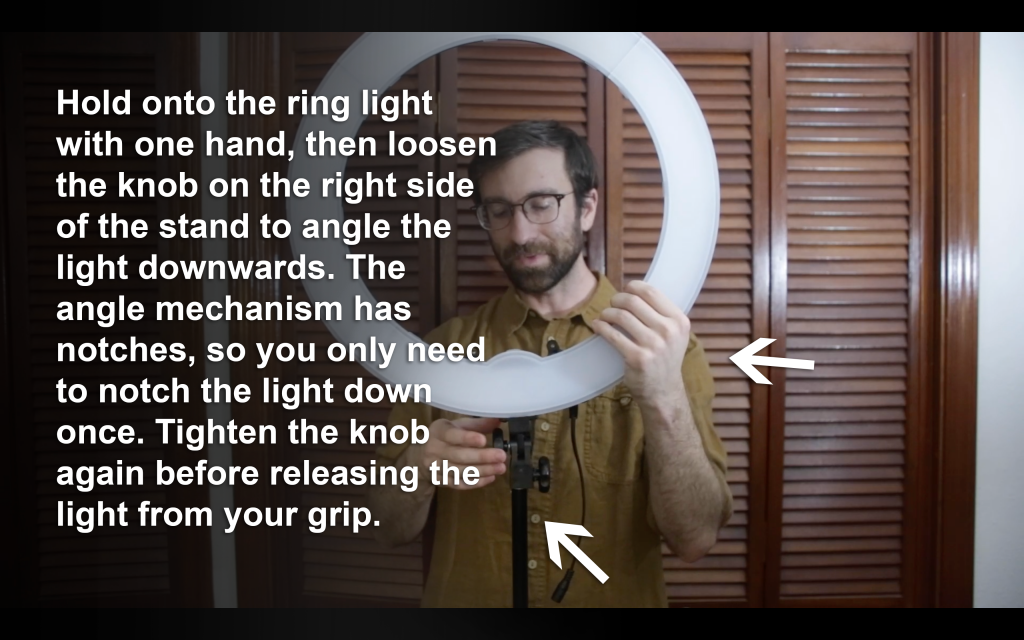
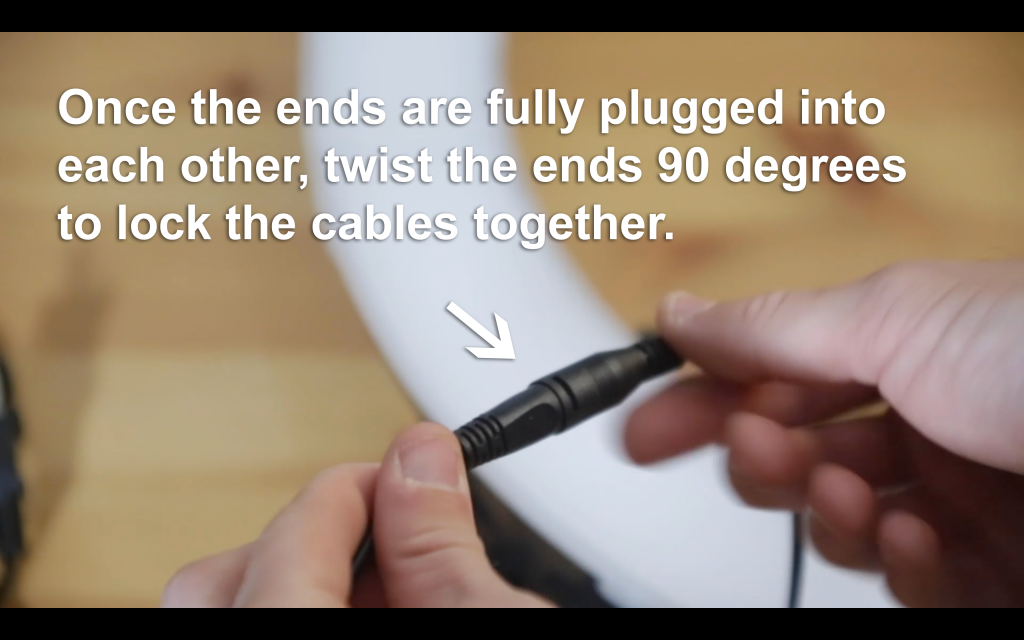
Now that we have prepared the stand, we can bring out the LED ring light.
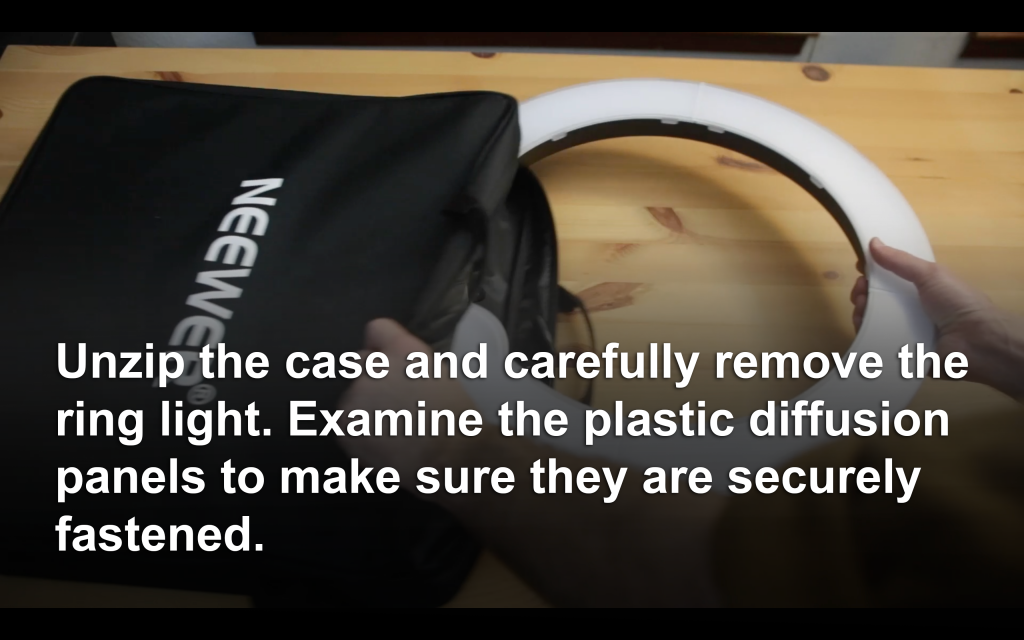
LED Ring Light
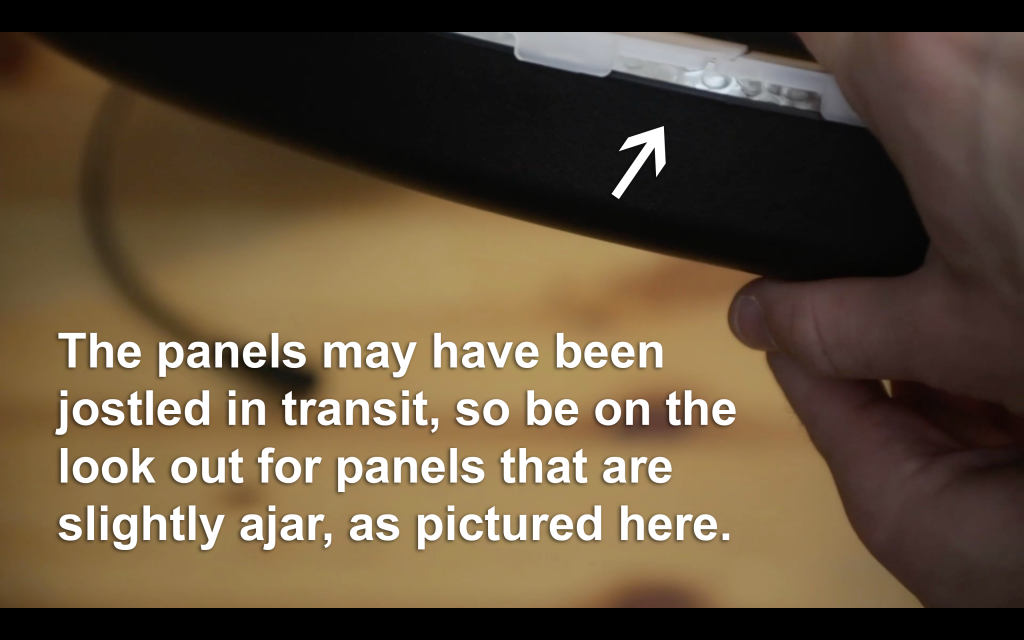
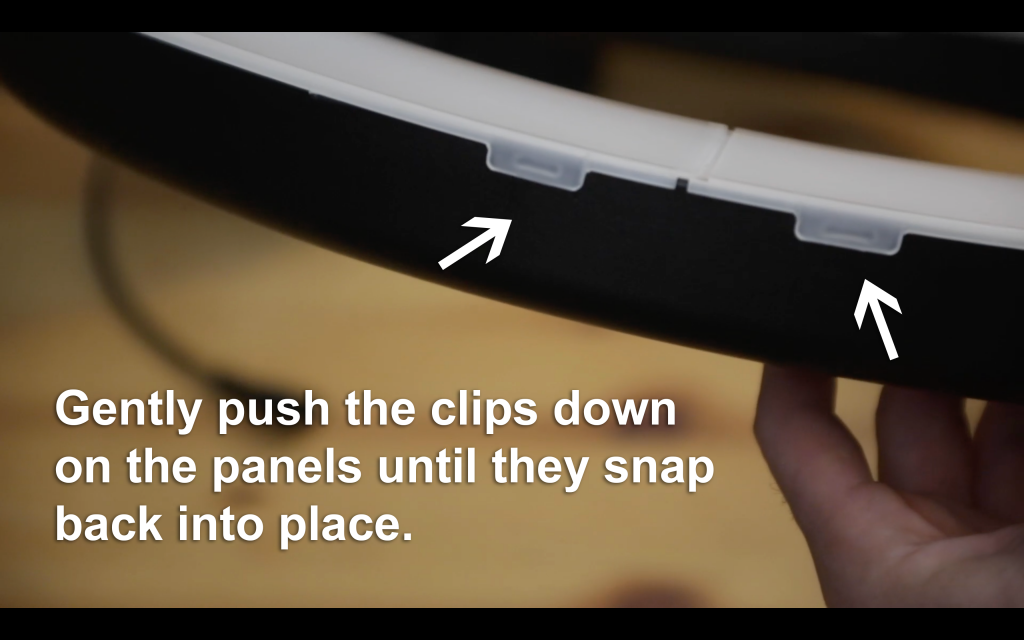
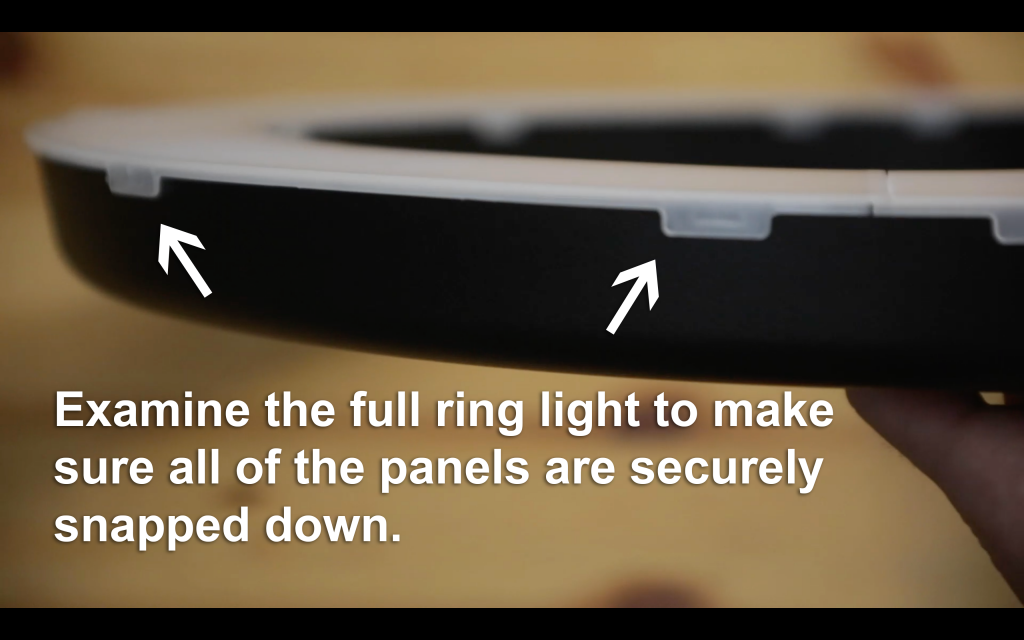
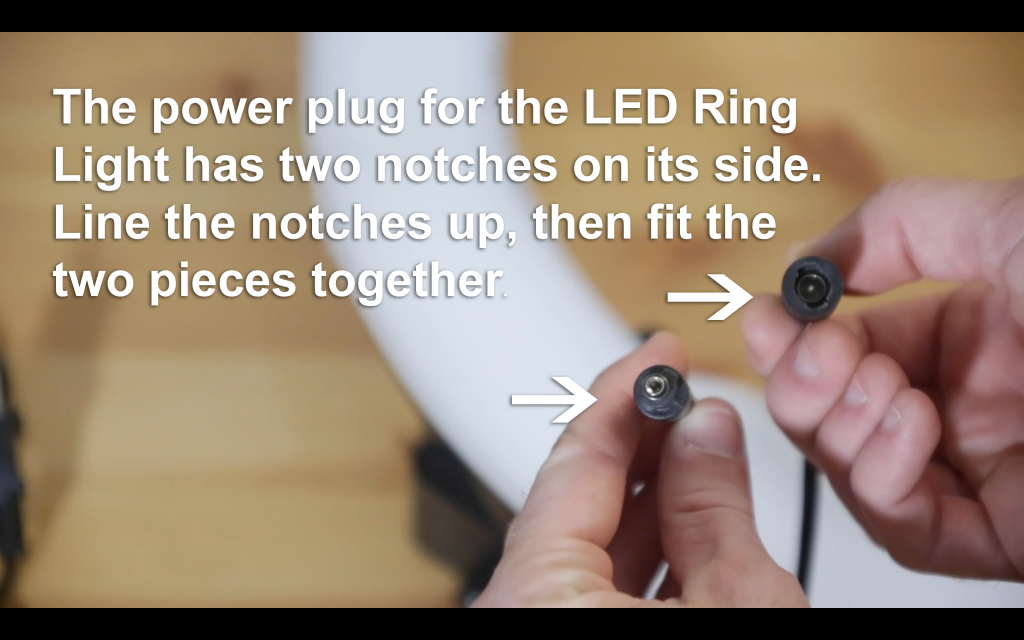
There are only two pieces to the LED ring light – the light and the power cable. Let’s take the light out of its case and examine it to make sure nothing came loose in transit.