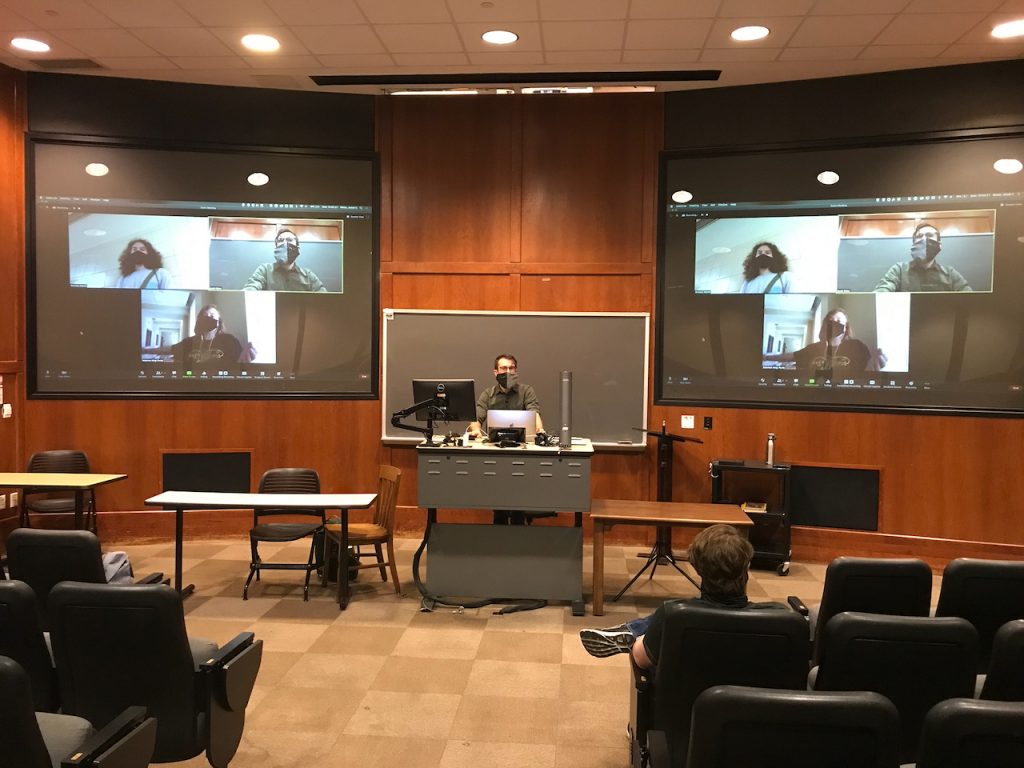
Here is the traditional classroom setup. As you can see on the screens, the professor is able to address the Zoom students and in-class students simultaneously. Unfortunately, students at home are not able to see the students in the class. Discussion amongst students might be a little difficult without proper facilitation.
Here are some examples of how students will experience this setup:
You’ll need to choose the equipment you’ll be investing in according to the size of your class. For example, a large or auditorium-sized classroom requires a webcam with a built-in microphone capable of picking up students in the back. For this reason, the Logitech Brio would be the best option for you. If you’re unsure of which webcam is right for you, you can refer to our size-specific classroom pages that provide more examples.
If this is the setup you think is best for your class, here is how you can achieve it:
Laptop Setup (if you plan on running applications off your laptop)
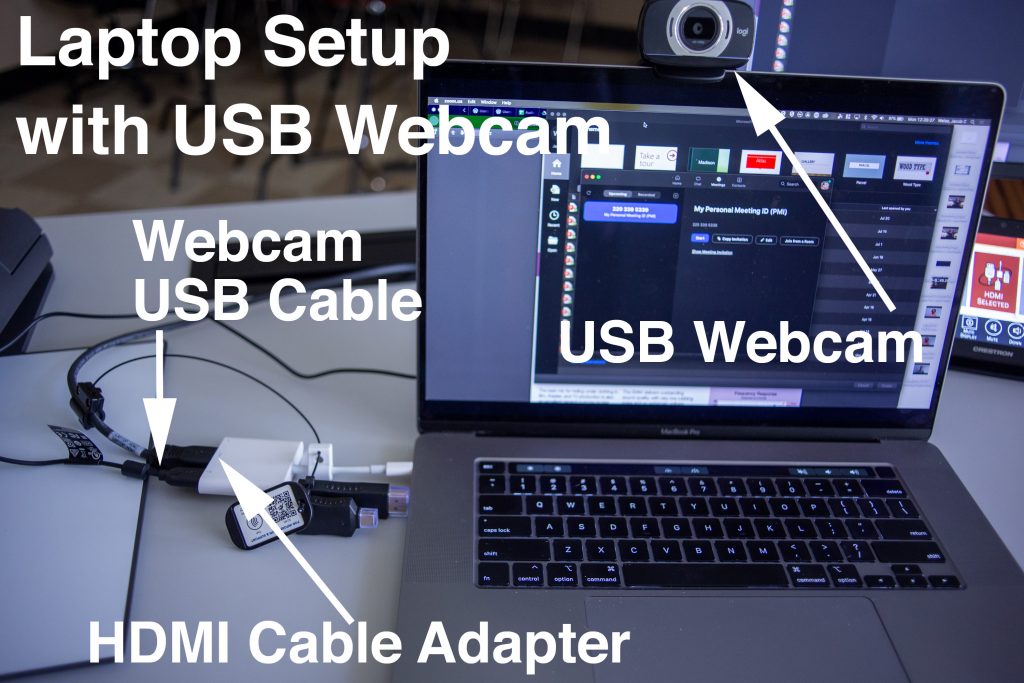
The image on the left uses an external webcam. If you’ve decided to use an external webcam, your cable connections will look similar to those in this image. You’ll need to connect your laptop to the console via HDMI. You’ll also need to connect your webcam to your laptop via USB. Depending on your laptop, you may need to use the HDMI and USB cable adapter.
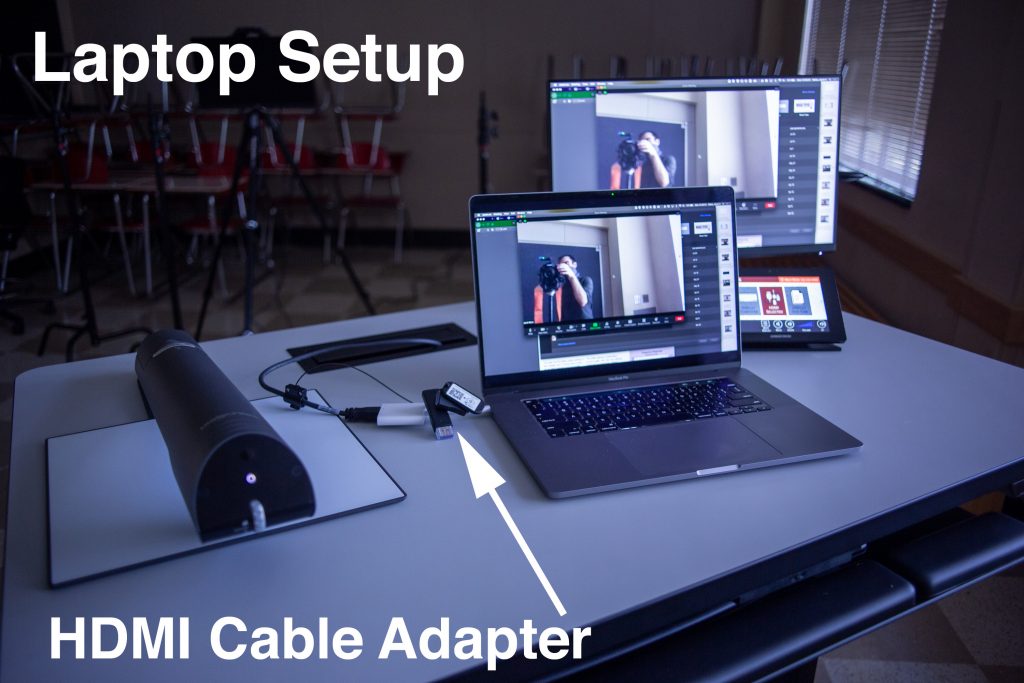
The image on the right uses the laptop’s built-in webcam. If you’ve decided to use your own laptop’s built-in webcam, you’ll only need to connect your laptop to the classroom console with the HDMI cable. Depending on your laptop, you may need to use the HDMI cable adapter.
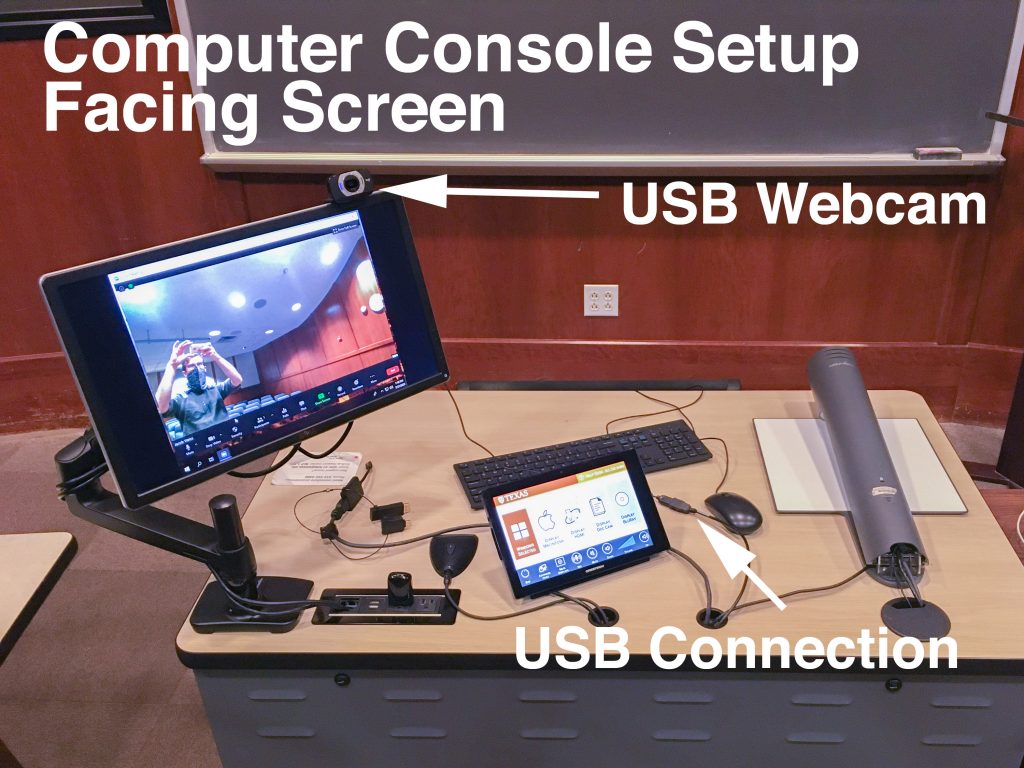
Computer Console Setup (if you plan on running applications off the classroom’s console)

You will need an external webcam if you plan on running this setup off the classroom’s computer console. In fact, it’s all you’ll need.

