Before we get started with the new equipment, you should take a quick look at your computer and software.
Make sure your computer has the latest system updates installed for your operating system as well as Google Chrome, and any other necessary software you will be using. Be careful – system updates can sometimes take 10 – 30 minutes to download and install, so try to plan this step at a time well before or after any scheduled classes or recordings.
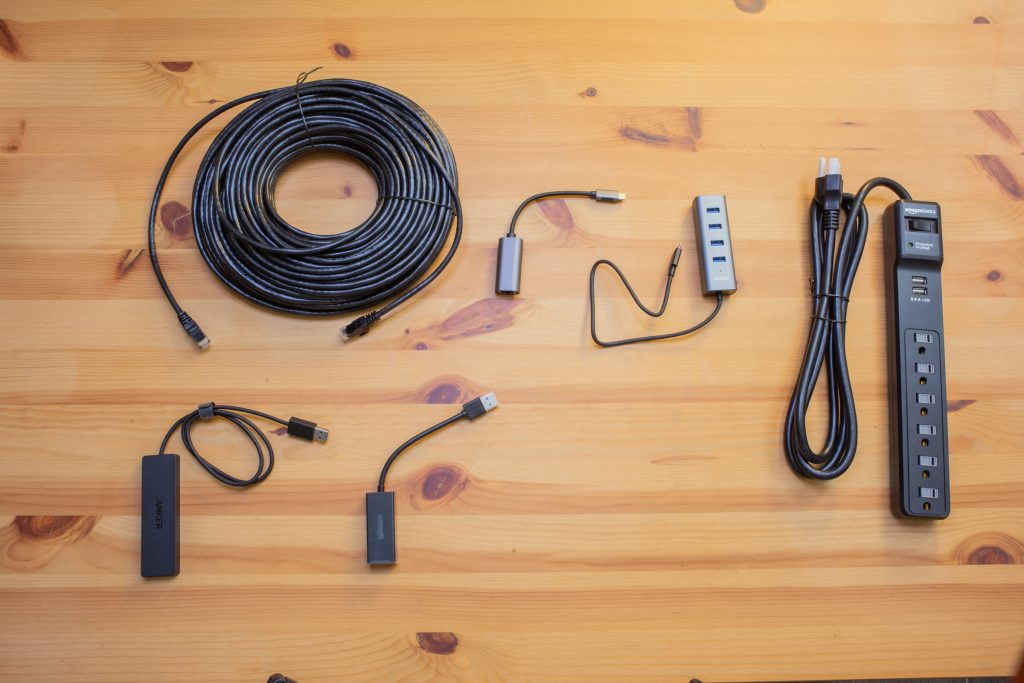
Items in your kit
Depending on your home or office computer, your existing connections or peripherals, or any other technology needs, the adapters and cables you receive from us will look different.
Here are some of the items you may be receiving in your kit.
Inputs and Cables
USB-A and USB-C connectors
Depending on your computer, you may have USB-A or USB-C connections — or both! Here is what they look like.

Hubs and Adapters
All of the equipment is compatible with Mac and PC, USB-A and USB-C, however some adapters may be necessary to plug in equipment into your computer. Here are what the various cables and connectors look like depending on if they are USB-A or USB-C.
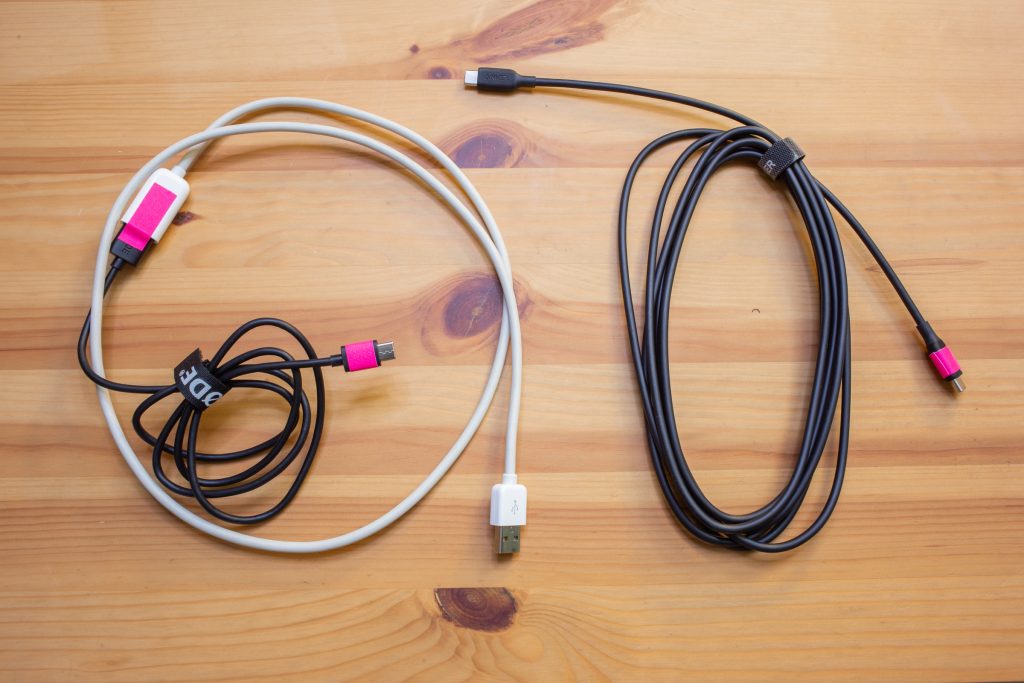
Left: USB-A to USB-C audio cable for RØDE Microphone. Right: USB-C to USB-C audio cable for RØDE Microphone. 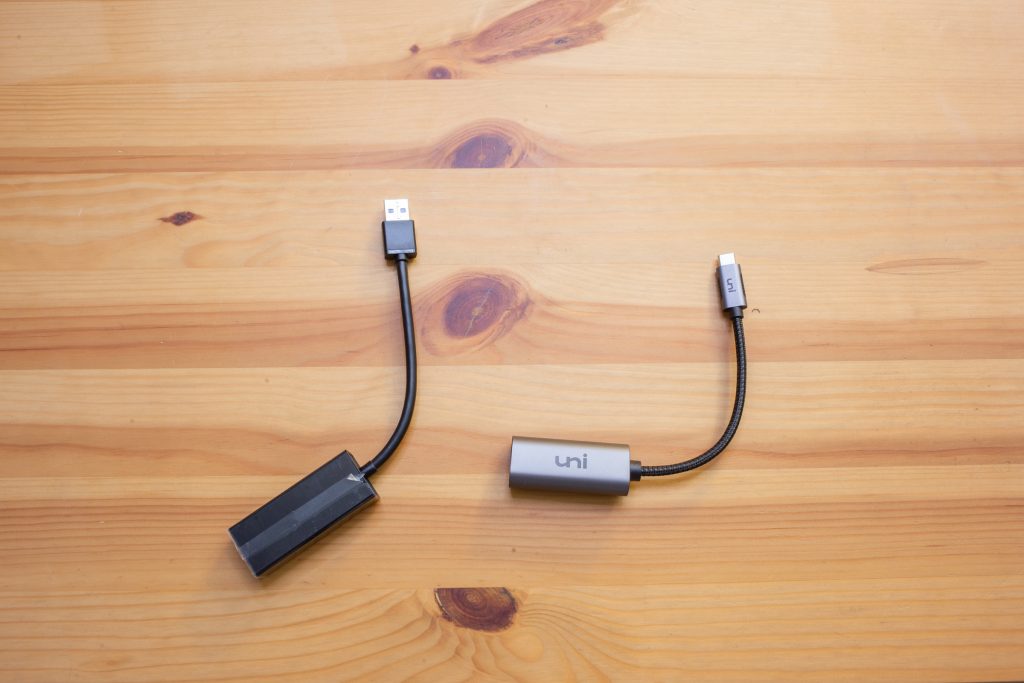
Left: USB-A to Ethernet Adapter Right: USB-C to Ethernet Adapter 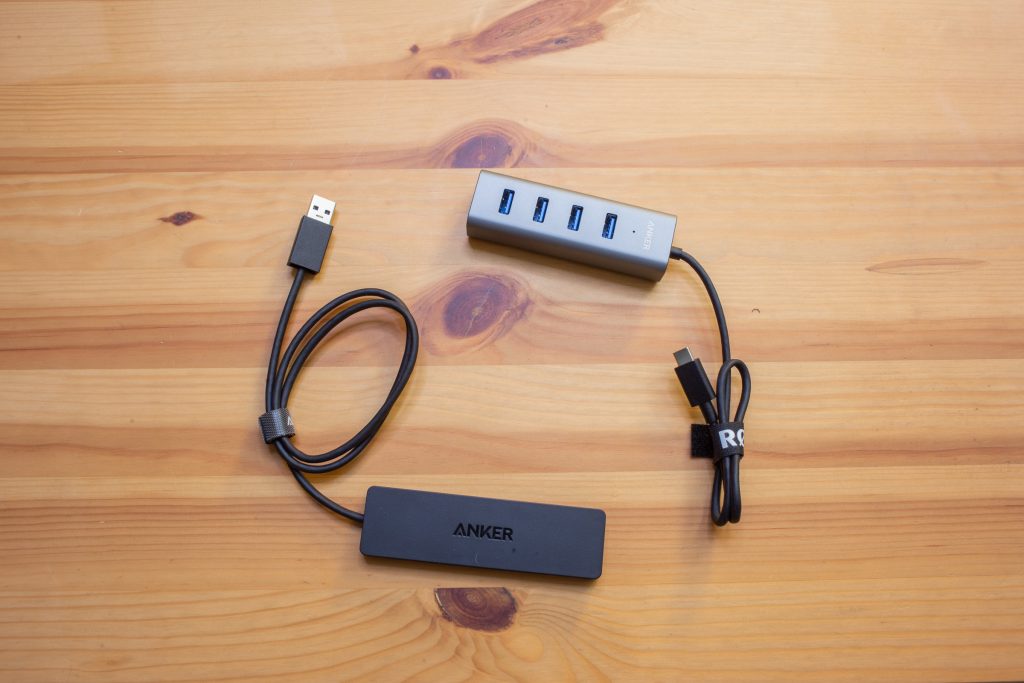
Left: USB-A to A Hub, Right: USB-C to A Hub
USB-A to Ethernet Adapter
All of the equipment is designed to work right away, without the need for drivers or any installation.
However, there is one exception. If you are on a Macintosh computer and using the USB-A to Ethernet adapter (pictured below), you will need to download and install a simple driver.
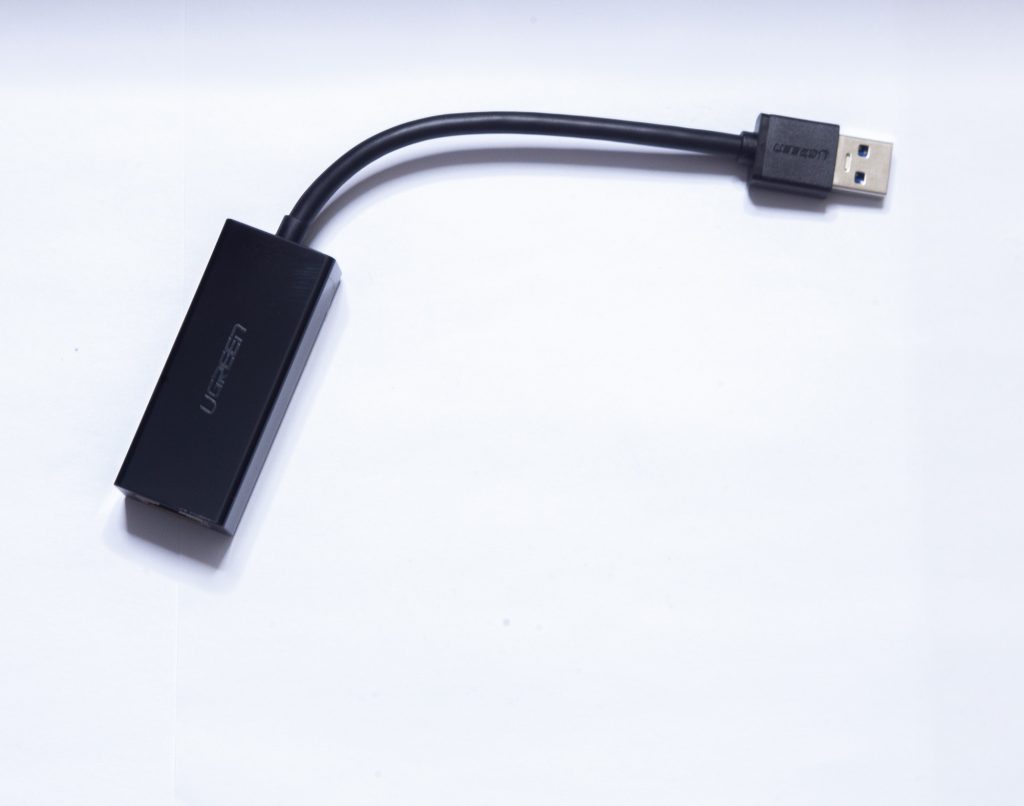
USB-A to Ethernet Adapter 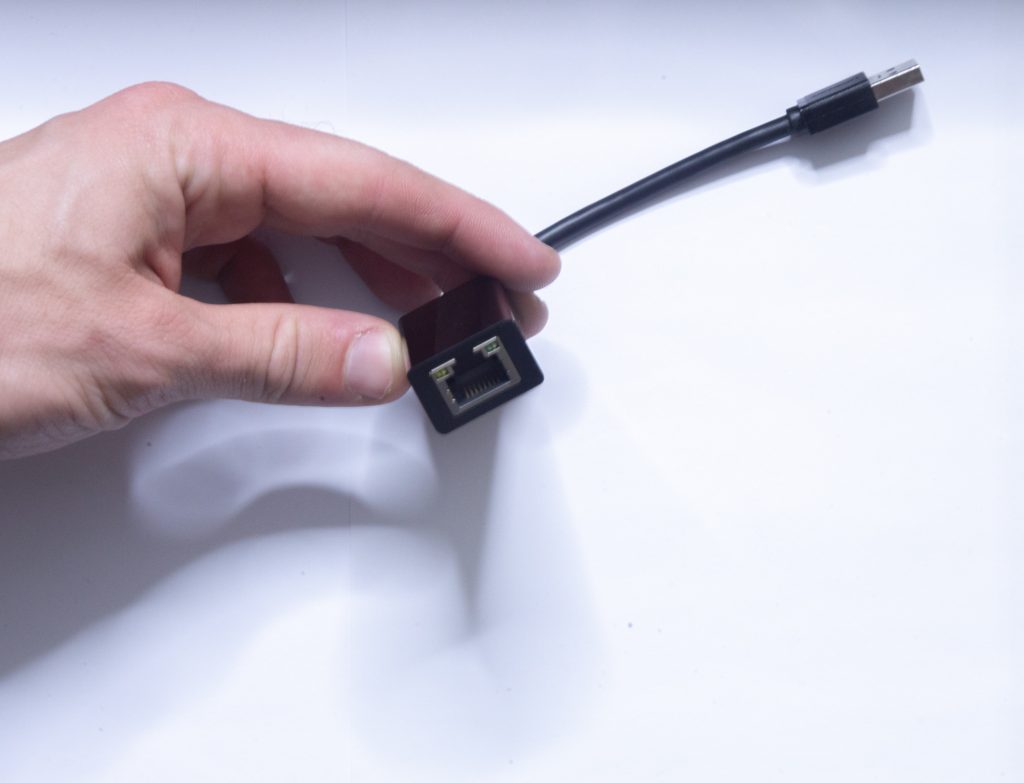
Ethernet Port
Download and Install USB-A to Ethernet Driver
The driver can be found at this website. Please follow the installation instructions below.
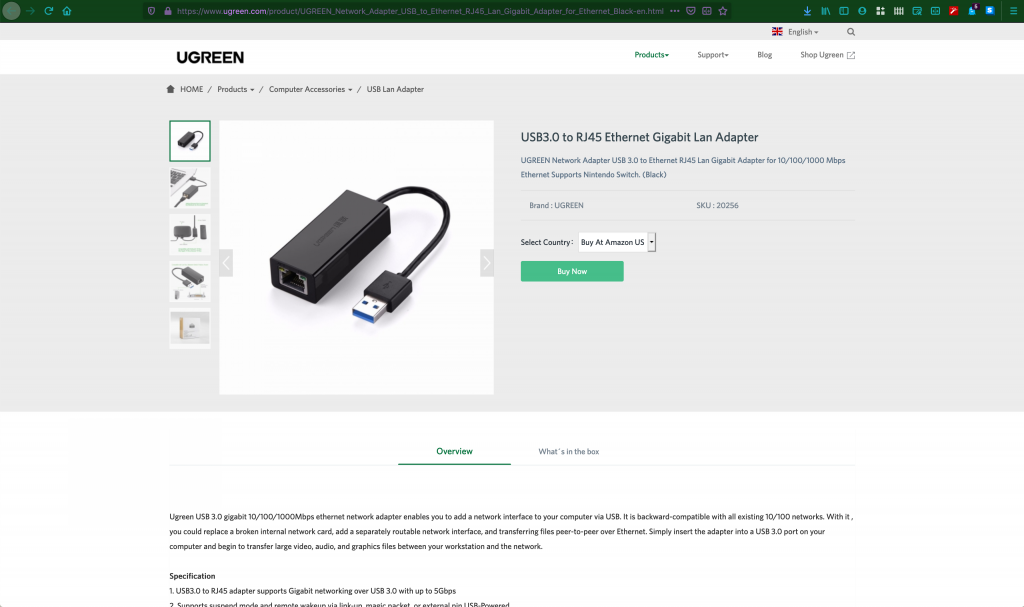
Click on the link provided in the text above. It should look like this. 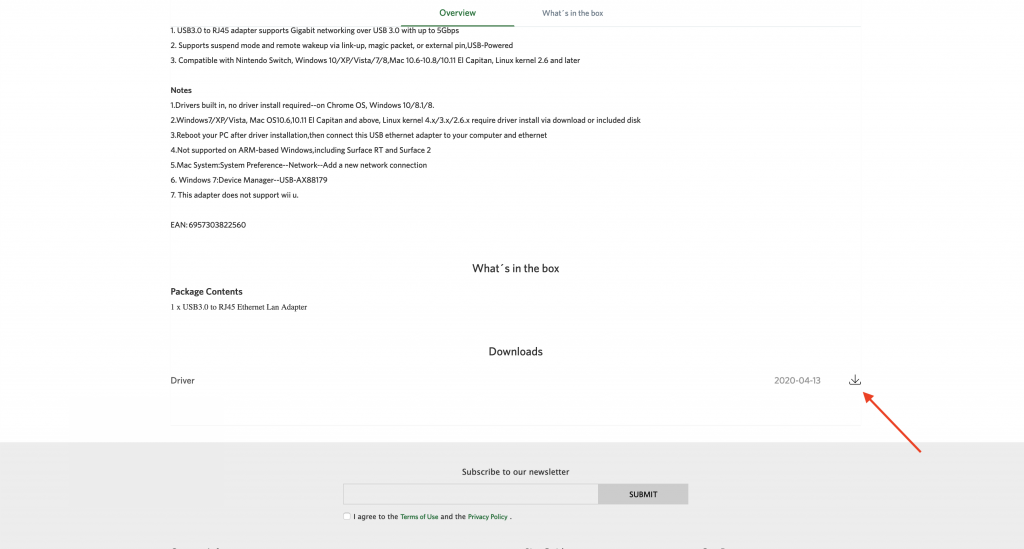
Scroll down to the bottom of the page and click on the Download button. 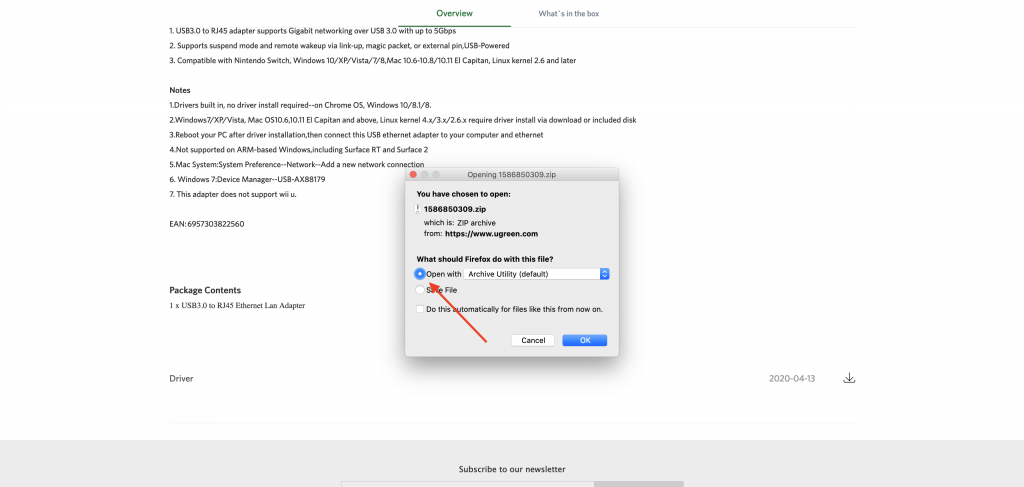
You will be prompted to Save and Open the file. Click OK to continue. 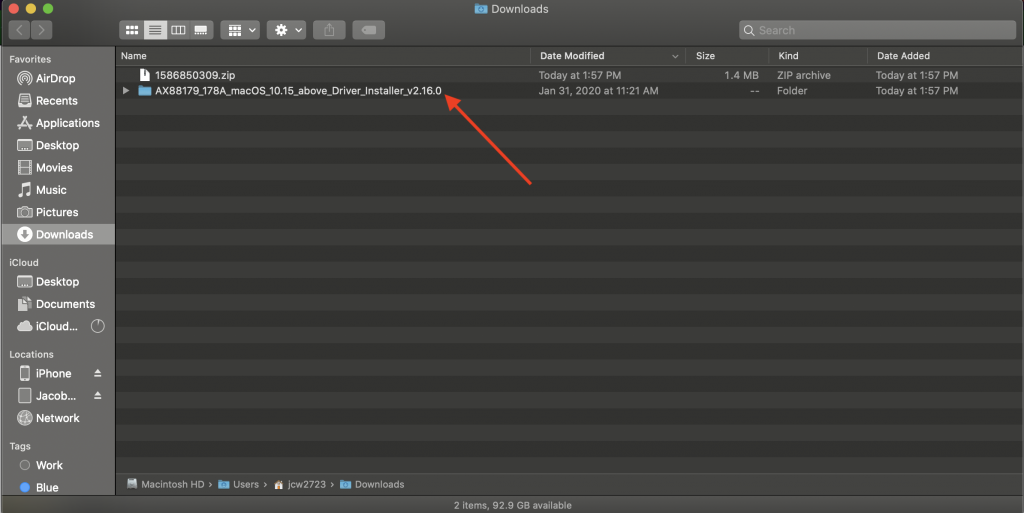
Locate the file in your Downloads folder — or the location you have chosen to download it in. Double-click on the folder. 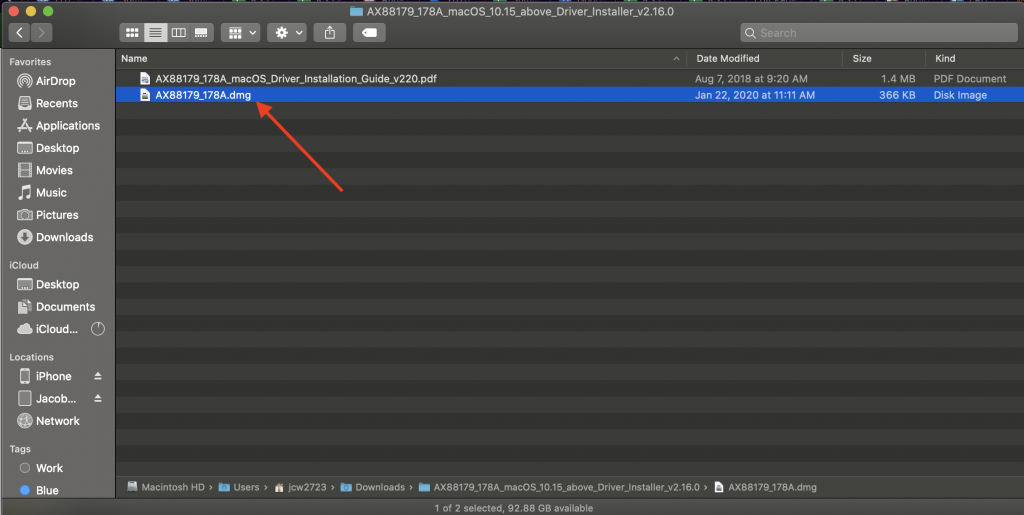
Next double click on the .dmg file. 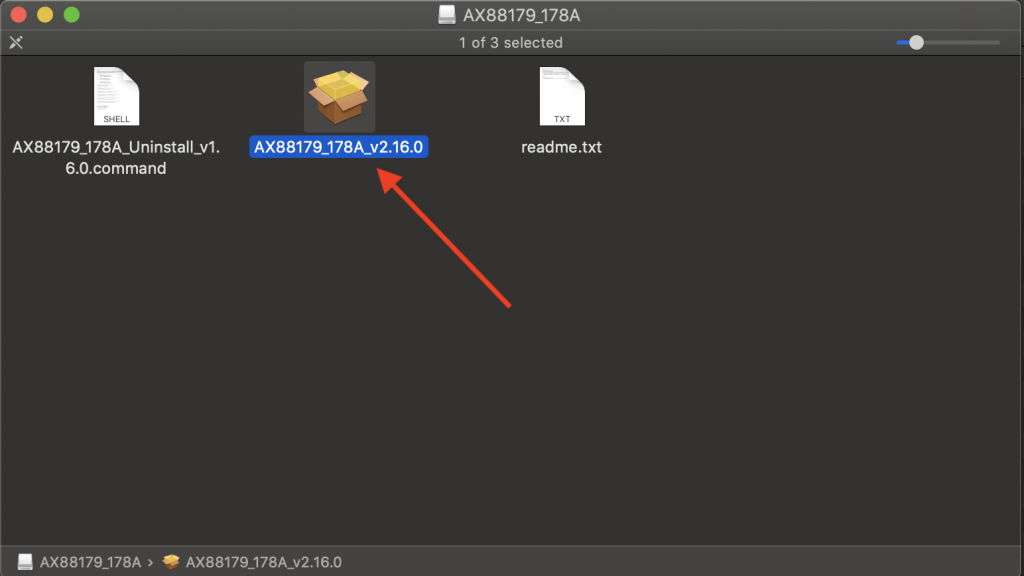
Double click on the .pkg file. 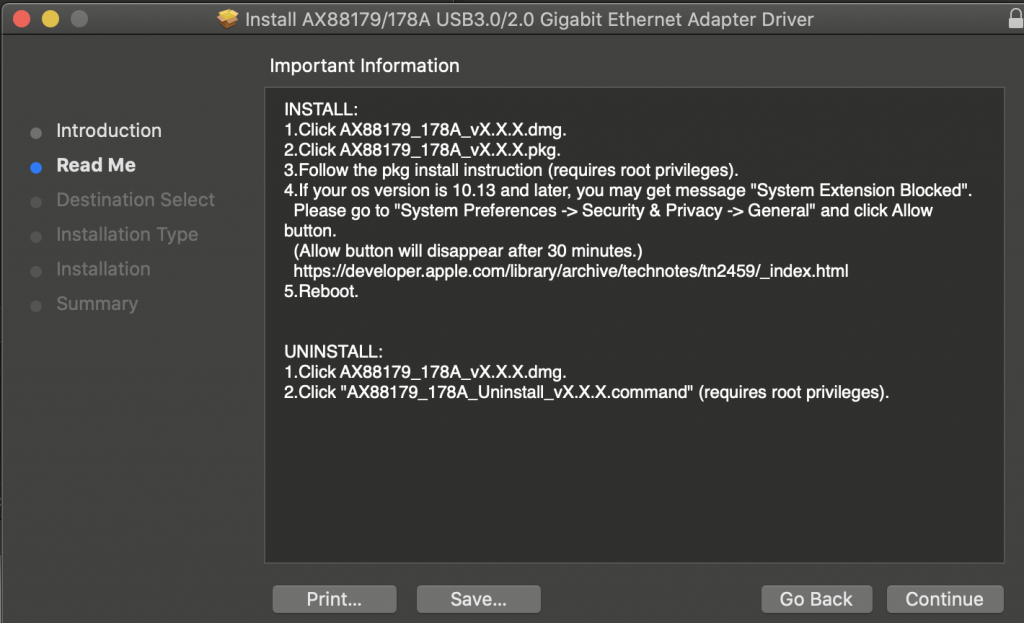
Next follow the installation process step by step. 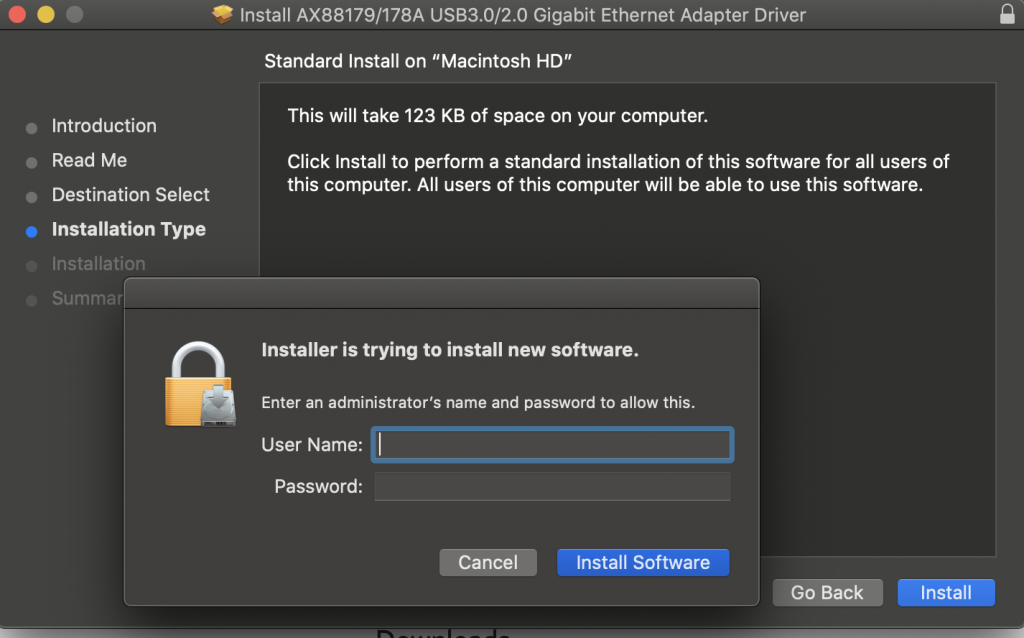
At the end of the process, you will need to enter your Administrator account and password. 
Finally, you will be prompted to Restart your computer. You must Restart the computer to complete the driver installation process, so be sure to save any work you have up before clicking “Continue Installation” 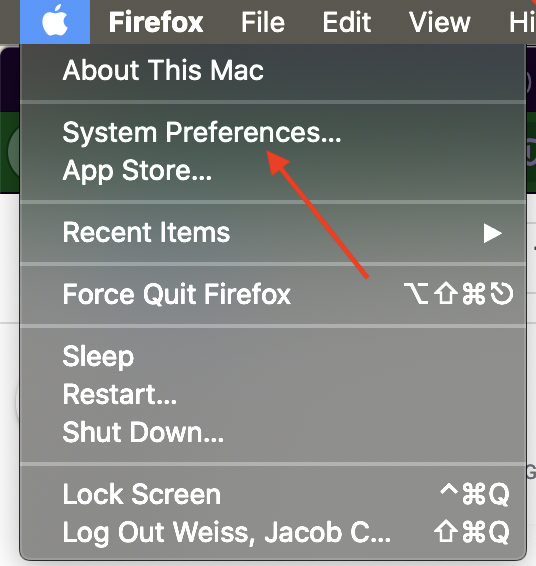
After you restart your computer, check to make sure the Ethernet connection is working. Click on the Apple logo in the top left of your computer, then click on System Preferences. 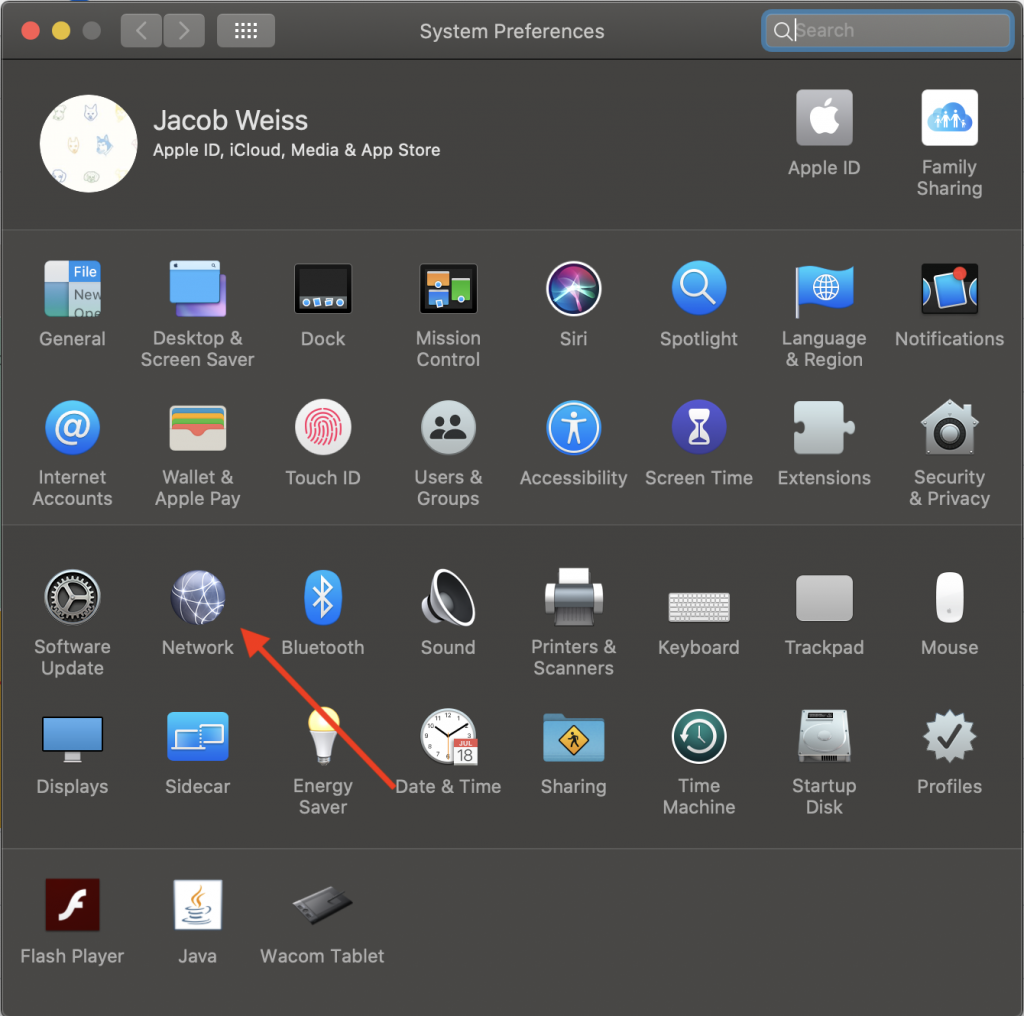
Next click on Network. 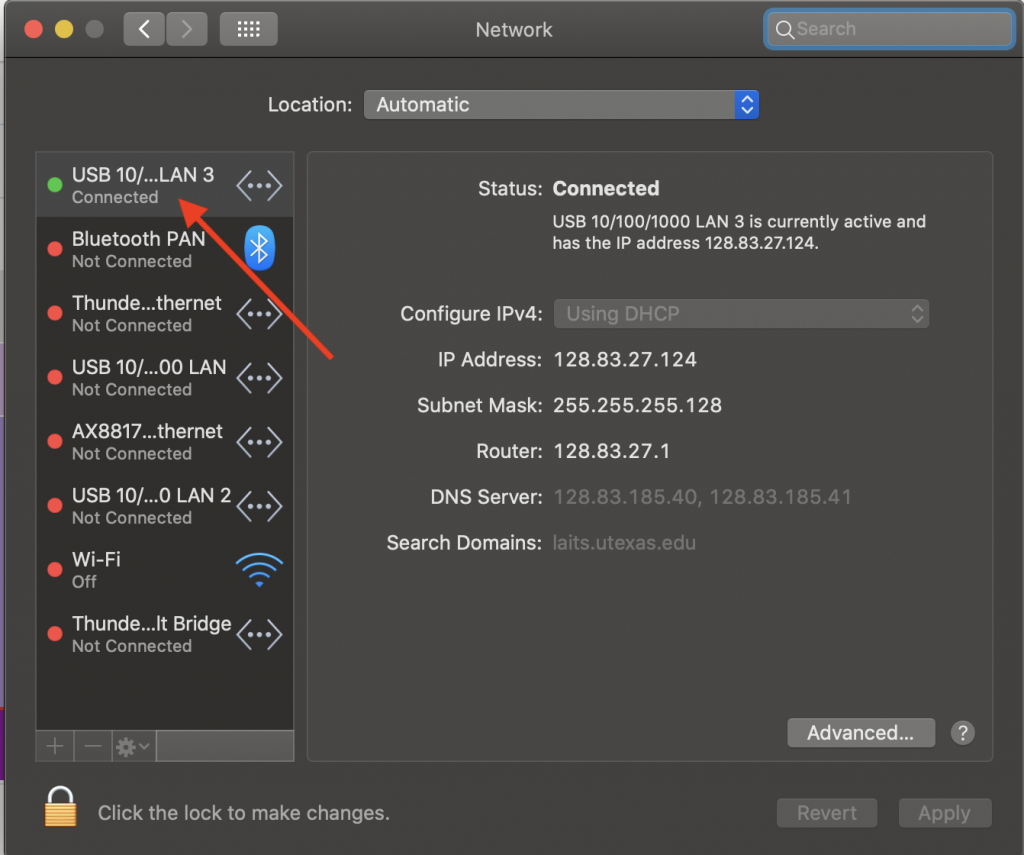
Verify that your USB internet connection has a green light next to it.
Document Camera
Some instructors will be using a Document Camera as part of their computer setup kit. Here is a video Tutorial on how to quickly set it up and change the settings.
iPad or Tablet Integration
We will be using Zoom or a similar application to pass your iPad or Tablet signal to our recording software. Here is a quick video demonstrating how to connect your computer to Zoom.